Planet LILUG

April 30, 2017

Josef "Jeff" Sipek

Exclusive Or Character

A couple of years ago I blogged about the CCS instruction in the Apollo Guidance Computer. Today I want to tell you about the XC instruction from the System/360 ISA.

Many ISAs have some sort of xor instruction. The 360 is no different. It offers several different xor instructions which differ in the type of operands that they operate on. In all cases, the operation they perform could be summarized as (using C syntax):

A ^= B;

That is one of the operands is used as both a source and a destination.

There are the boring X (reg ^= memory), XR (reg ^= reg), and XI (reg ^= immediate). Then there is XC which is what inspired this post. XC, or Exclusive Or Character, takes two memory locations and a length and performs what appears as byte by byte xor of the two buffers. (The hardware is smart enough to operate on bigger chunks of memory but the effect is as if it was done byte at a time.) In assembly XC looks like:

XC d1(l,b1),d2(b2)

The d are 12-bit unsigned displacements while the b specify the registers with the base address. For each of the operands the actual address is dX plus the value of the bX register. The l is a length field which encodes a length between 1 and 256.

To use more C pseudocode, XC does:

void XC(unsigned char *op1, size_t len, unsigned char *op2)
{
	while (len--) {
		*op1 ^= *op2;
		op1++;
		op2++;
	}
}

(This pseudo code ignores the condition code calculation and exception generation which are not relevant to the discussion.)

This by itself is neat but not every exciting…until you remember that xor can be used to zero out a register. You can use XC to zero out up to 256 bytes of memory. It turns out this idiom is used pretty often in handwritten assembly, and compilers such as gcc even produce such instructions without any special effort on the programmer’s behalf.

For example, in HVF I have this line:

memset(&psw, 0, sizeof(struct psw));

Which GCC helpfully turns into (struct psw is 16 bytes in size):

xc      160(16,%r15),160(%r15)

When I first saw that line in the disassembly of HVF years ago, it blew my mind. It is elegant, fast thanks to the microarchitecture optimizations, and once you are used to the idiom it is clear about what it does. I hope your mind was as blown as mine. Till next time!

by JeffPC at April 30, 2017 02:05 PM

April 29, 2017

Josef "Jeff" Sipek

Modern Mercurial

I’ve been using both Git and Mercurial since they were first released in 2005. I’ve messed with the internals of both, but I always had a preference for Mercurial (its user interface is cleaner, its design is well thought-out, and so on). So, it should be no surprise that I felt a bit sad every time I heard that some project chose Git over Mercurial (or worse yet, migrated from Mercurial to Git). At the same time, I could see Git improving release after release—but Mercurial did not seem to. Seem is the operative word here.

A couple of weeks ago, I realized that more and more of my own repositories have been Git based. Not for any particular reason other than that I happened to type git init instead of hg init. After some reflection, I decided that I should convert a number of these repositories from Git to Mercurial. The conversion itself was painless thanks to the most excellent hggit extension that lets you clone, pull, and push Git repositories with Mercurial. (I just cloned the Git repository with a hg clone and then cleaned up some of the mess manually—for example, I don’t need the bookmark corresponding to the one and only branch in the original Git repository.) Then the real fun began.

I resumed the work on my various projects, but now with the brand-new Mercurial repositories. Soon after I started hitting various quirks with the Mercurial UI. I realized that the workflow I was using wasn’t really aligned with the UI. Undeterred, I looked for solutions. I enabled the pager extension, the color extension, overrode some of the default colors to be less offensive (and easier to read), enabled the shelve, rebase, and histedit extensions to (along with mq) let me do some minor history rewriting while I iteratively work on changes. (I learned about and switched to the evolve extension soon after.) With each tweak, the user experience got better and better.

Then it suddenly hit me—before these tweaks, I had been using Mercurial like it’s still 2005!

I think this is a very important observation. Mercurial didn’t seem to be improving because none of the user-visible changes were forced onto the users. Git, on the other hand, started with a dreadful UI so it made sense to enable new features by default to lessen the pain.

One could say that Mercurial took the Unix approach—simple and not exactly friendly by default, but incredibly powerful if you dig in a little. (This extensibility is why Facebook chose Mercurial over Git as a Subversion replacement.)

Now I wonder if some of the projects chose Git over Mercurial at least partially because by default Mercurial has been a bit…spartan.

With my .hgrc changes, I get exactly the information I want in a format that’s even better than what Git provided me. (Mercurial makes so much possible via its templating engine and the revsets language.)

So, what does all this mean for Mercurial? It’s hard to say, but I’m happy to report that there is a number of good improvements that should land in the upcoming 4.2 release scheduled for early May. For example, the pager and color functionality is moving into the core and they will be on by default.

Finally, I like my current Mercurial environment quite a lot. The hggit extension is making me seriously consider using Mercurial when dealing with Git repositories that I can’t convert.

by JeffPC at April 29, 2017 02:50 AM

April 22, 2017

Josef "Jeff" Sipek

March 23, 2017

Josef "Jeff" Sipek

2017-03-23

The million dollar engineering problem — Scaling infrastructure in the cloud is easy, so it’s easy to fall into the trap of scaling infrastructure instead of improving efficiency.

Some Notes on the “Who wrote Linux” Kerfuffle

The Ghosts of Internet Time

How a personal project became an exhibition of the most beautifully photographed and detailed bugs you ever saw — Amazing photos of various bugs.

Calculator for Field of View of a Camera and Lens

The Megaprocessor — A microprocessor built from discrete transistors.

Why Pascal is Not My Favorite Programming Language

EAA Video — An assortment of EAA produced videos related to just about anything aircraft related (from homebuilding to aerobatics to history).

The Unreasonable Effectiveness of Recurrent Neural Networks

by JeffPC at March 23, 2017 03:03 AM

March 18, 2017

Josef "Jeff" Sipek

The Mobile Cat

About three weeks ago I got the idea to put a phone in front of the cat and use it to light her. It took a while for everything to align (she needed to be resting just the right way, it had to be dark, and I had to notice and have my camera handy), but I think the result was worth it:

by JeffPC at March 18, 2017 01:17 PM

March 17, 2017

Josef "Jeff" Sipek

D750: A Year In Statistics

It has been a year since I got the D750 and I thought it would be fun to gather some statistics about the photos.

While I have used a total of 5 different lenses with the D750, only three of them got to see any serious use. The lenses are:

Nikon AF Nikkor 50mm f/1.8D
This is the lens I used for the first month. Old, cheap, but very good.
Nikon AF Nikkor 70-300mm f/4-5.6D ED
I got this lens many years ago for my D70. During the first month of D750 ownership, I couldn’t resist seeing what it would behave like on the D750. It was a disaster. This lens just doesn’t create a good enough image for the D750’s 24 megapixel sensor.
Nikon AF-S Nikkor 24-120mm f/4 ED VR
I used this lens when I test-drove the D750, so technically I didn’t take these with my camera. With that said, I’m including it because it makes some of the graphs look more interesting.
Nikon AF-S Nikkor 24-70mm f/2.8G ED
After a month of using the 50mm, I got this lens which became my walk around lens.
Nikon AF-S Nikkor 70-200mm f/2.8G ED VR II
Back in June, Nikon had a sale and that ended up being just good enough to convince me to spend more money on photography gear.

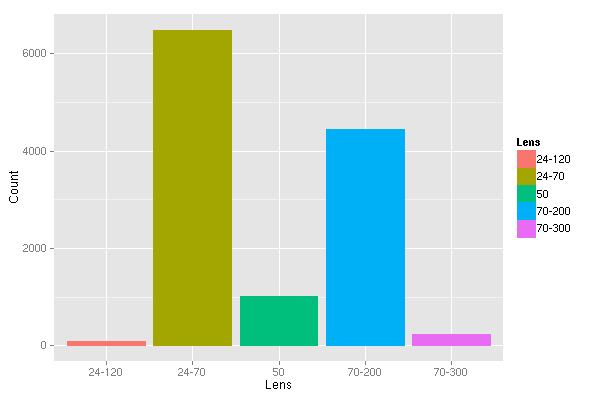
Now that we’ve covered what lenses I have used, let’s take a look at some graphs. First of all, the number of images taken with each lens:

Not very surprising. Since June, I have been taking with me either the 24-70mm, or 70-200mm, or both if the extra weight is not a bother. So it is no surprise that the vast majority of my photos have been taken with those two lenses. The 50mm is all about that first month when I had a new toy (the D750!) and so I dragged it everywhere. (And to be fair, the 50mm lens is so compact that it is really easy to drag it everywhere.) The 230 photos taken with the 70-300mm are all (failed) attempts at plane spotting photography.

First, let’s look at the breakdown by ISO (in 1/3 stop increments):

This is not a surprising graph at all. The D750’s base ISO is 100 and the maximum native ISO is 12800. It is therefore no surprise that most of the photos were taken at ISO 100.

I am a bit amused by the spikes at 200, 400, and 800. I know exactly why these happen—when I have to adjust the exposure by a large amount, I tend to scroll the wheels a multiple of three notches.

Outside of the range, there are a couple of photos (52) taken at ISO 50 (which Nikon calls “Lo 1”) to work around the lack of an ND filter. There is actually one other photo outside of the native ISO range that I did not plot at all—the one photo I took at ISO 51200 (“Hi 2”) as a test.

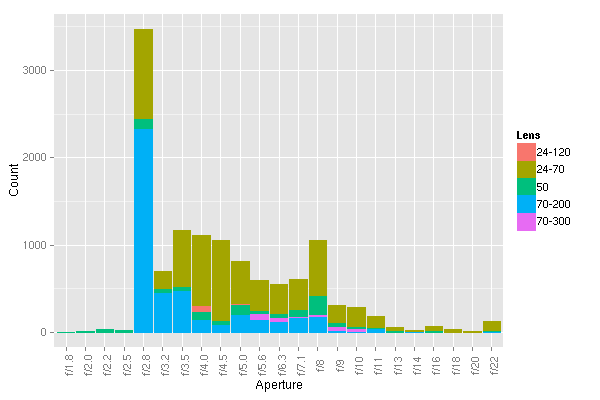
Now, let’s break the numbers down differently—by the aperture used (again in 1/3 stop increments):

I am actually surprised that so many of them are at f/2.8. I’m well aware that most lenses need to be stepped down a little for best image quality, but apparently I don’t do that a third of the time. It is for this kind of insight that I decided to make this blahg post.

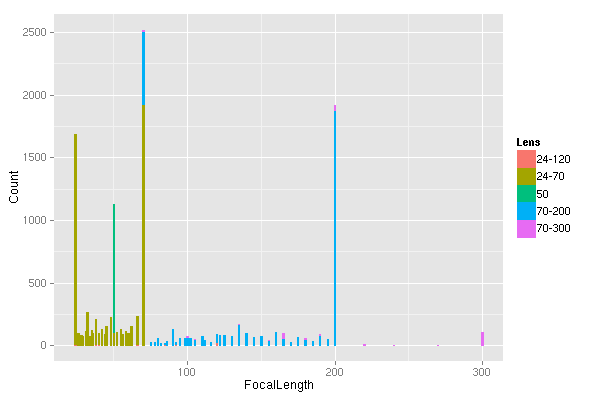
Moving on to focal length. This is by far the least interesting graph.

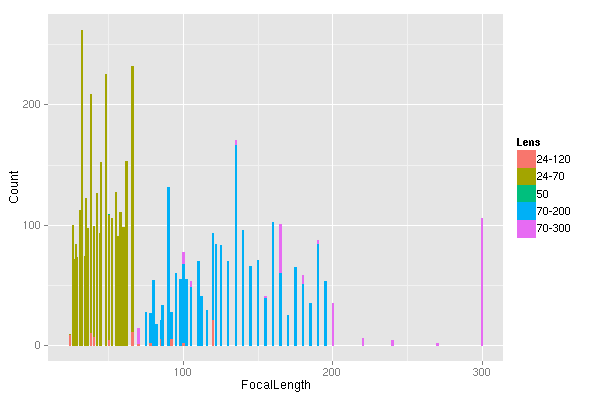
You can clearly see 4 large spikes—at 24 mm, 50 mm, 70 mm, and 200 mm. All of those are because of focal length limits of the lenses. Removing any data points over 500 yields a slightly more readable graph:

It is interesting that the focal length that is embedded in the image doesn’t seem to be just any integer, but rather there appear to be “steps” in which it changes. The step also isn’t constant. For example, the 70-200mm lens seems to encode 5 mm steps above approximately 130 mm but 2-3 mm below it.

I realize this is a useless number given that we are dealing with nothing like a unimodal distribution, but I was curious what the mean focal length was. (I already know that the most common ones are 24 mm and 70 mm for the 24-70mm, and 70 mm and 200 mm for the 70-200mm lens.)

Lens Mean Focal Length Count
24-120    73.24138 87
24-70    46.72043 6485
50    50.00000 1020
70-200    151.69536 4438
70-300    227.82609 230

Keep in mind these numbers include the removed spikes.

Just eyeballing the shutter speed data, I think that it isn’t even worth plotting.

So, that’s it for this year. I found the (basic) statistics interesting enough, and I learned that I stay at f/2.8 a bit too much.

by JeffPC at March 17, 2017 07:02 PM

March 12, 2017

Josef "Jeff" Sipek

Flying around Mount Monadnock

Last week I planned on doing a nice cross country flight from Wikipedia article: Fitchburg. Inspired by Garrett Fisher’s photos, I took my camera and the 70-200mm lens with me hoping to get a couple of nice photos of the landscapes in New Hampshire.

Sadly, after taking off from KFIT I found out that not only was there the stiff wind that was forecasted (that’s fine) but the air was sufficiently bumpy that it wouldn’t have been a fun flight. On top of that, the ADS-B unit was having problems acquiring a GPS signal. (Supposedly, the firmware sometimes gets into a funny state like this. The good news is that there is a firmware update available that should address this.) I contacted KASH tower to check if they could see my transponder—they did, so I didn’t have to worry about being totally invisible.

Since I was already off the ground, I decided to do some nearby sightseeing, landing practice, and playing with the Garmin GNS 430 GPS.

First, I headed northwest toward Wikipedia article: Mount Monadnock. While I have seen it in the distance several times before, I never got to see it up close, so this seemed like a worthwhile destination.

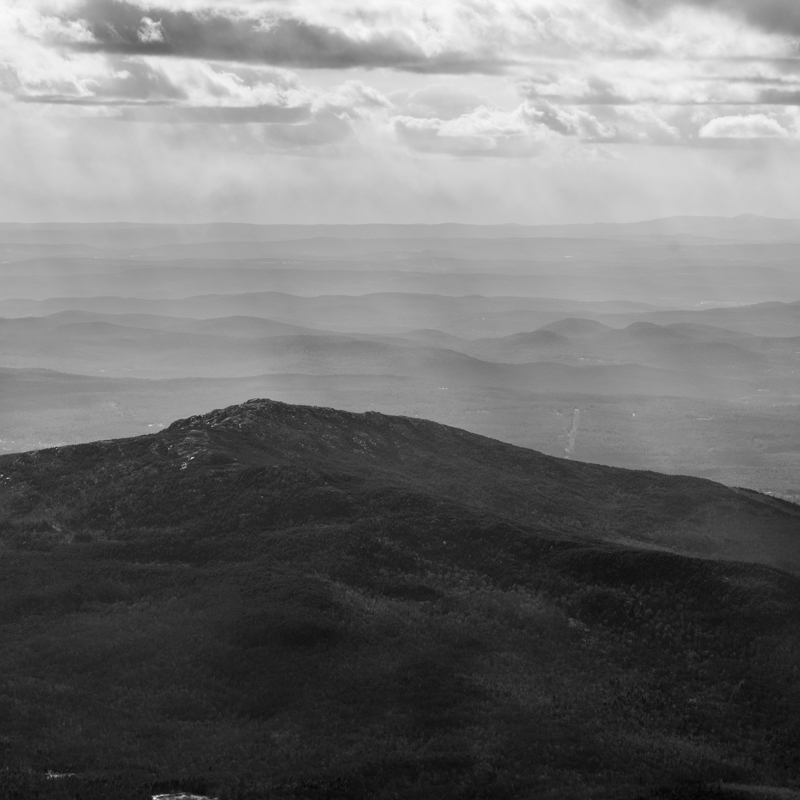
As I approached it, I ended up taking out my camera and getting a couple of photos of the hills and mountains in New Hampshire. It was interesting how the the view to the north (deeper into New Hampshire) is hilly, but the view more east (and certainly south) is flatter. (Both taken near Mount Monadnock.)

While the visibility was more than good enough for flying, it didn’t work out that well for photography. In all of the photos, the landscape far away ended up being heavily blue-tinted. No amount of playing around with white balance adjustment in Lightroom was able to correct it. (Either the background was too blue, or the foreground was too yellow/brown.) That’s why all of these photos are black and white.

I made a full turn around Monadnock, taking a number of shots but this one is my favorite:

Once done with Monadnock, I headed south to the Wikipedia article: Quabbin Reservoir in Massachusetts. This is a view toward the south from near its north end:

At this point I started heading to KORH to do some landing practice. Since I was plenty busy, there are no photos.

I’ve never been to this airport before and landing at new airports is always fun. The first interesting thing about it is that it is situated on a hill. While most airports around here are at 200-400 feet MSL, this one is at 1000 feet. The westerly wind favored runway 29 which meant I got to see a second interesting aspect of this airport. The beginning of runway 29 is on the edge of the hill. That by itself doesn’t sound very interesting, but consider that the runway is at 1000 feet while the bottom of the hill (a mere 0.9 km away) is at 500 feet MSL. That is approximately a 17% grade. So, as you approach the runway, at first it looks like you are way too high but the ground comes up significantly faster than normal.

I am still hoping to do my originally planned cross country flight at some point. Rest assured that I will blahg about it.

by JeffPC at March 12, 2017 03:15 PM

March 02, 2017

Josef "Jeff" Sipek

Plane-spotting in Manchester, NH

Last weekend I got to drive to Wikipedia article: Manchester, so I used the opportunity to kill some time near the airport by watching planes and taking photos (gallery).

The winds were coming from the south, so runway 17 was in use. I think those are the best plane spotting conditions at KMHT.

It is relatively easy to watch aircraft depart and fly directly overhead:

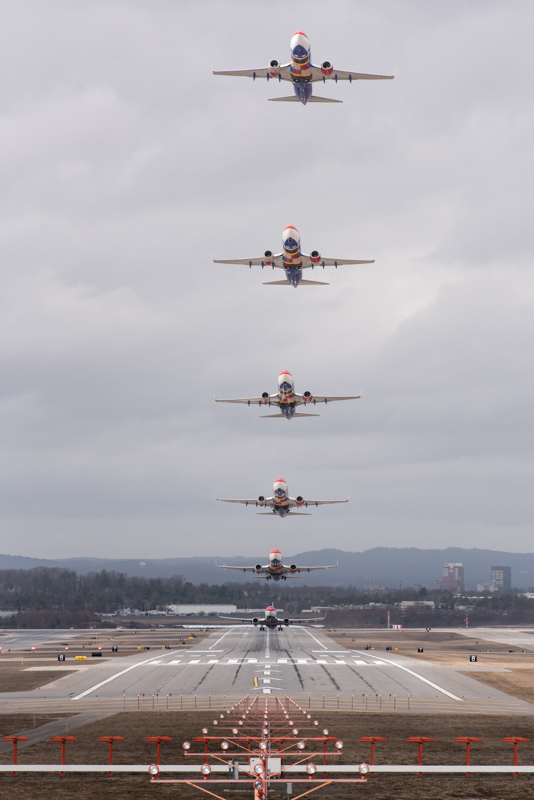
Unlike all my previous plane spotting, this time I tried something new—inspired by Mike Kelly’s Airportraits, I decided to try to make some composite images. Here is a Southwest Boeing 737 sporting one of the Wikipedia article: special liveries:

It was certainly an interesting experience.

At first I thought that I would be able to use the 7 frames/second that the D750 can do for the whole departure, but it turns out that the planes move far too slowly, so the camera buffer filled up way too soon and the frame rate became somewhat erratic. What mostly ended up working was switching to 3 frames/second and taking bursts. Next time, aiming for about 2 frames/second should give me enough images to work with.

Even though I used a tripod, I expected that I would have to align the images to remove the minor misalignment between images due to the vibration from the rather strong wind and my hand depressing the shutter. It turns out that the misalignment (of approximately 10 pixels) was minor enough that it did not change the final image.

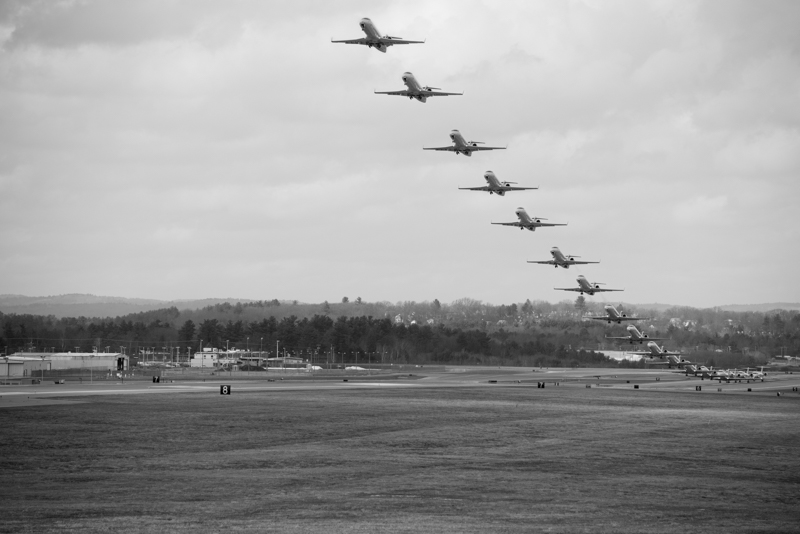
Here’s an American Airlines commuter taking off from runway 17. (I repositioned to get a less head-on photo as well.)

For those curious, I post processed each of the images in Lightroom, exported them as TIFFs, and then used GIMP to do the layering and masking. Finally, I exported the final image and imported it back into Lightroom for safekeeping.

As a final treat, as I was packing up a US Army Gulfstream took off:

As far as I can tell, they use this one to transport VIPs. I wonder who was on board…

by JeffPC at March 02, 2017 09:27 PM

February 18, 2017

Nate Berry

Slow wifi with Intel 7265 iwlwifi on Arch

I use my Arch powered bootable USB drive on lots of different hardware, but most often on hand-me-down laptops from work. I recently moved into a newish laptop (a Dell Inspiron 13-7352, P57G) which came with an Intel 7265D wireless card. Its a really nice 2 in 1 laptop where the screen folds back so …

by Nate at February 18, 2017 03:17 AM

February 06, 2017

Josef "Jeff" Sipek

Visiting Helsinki

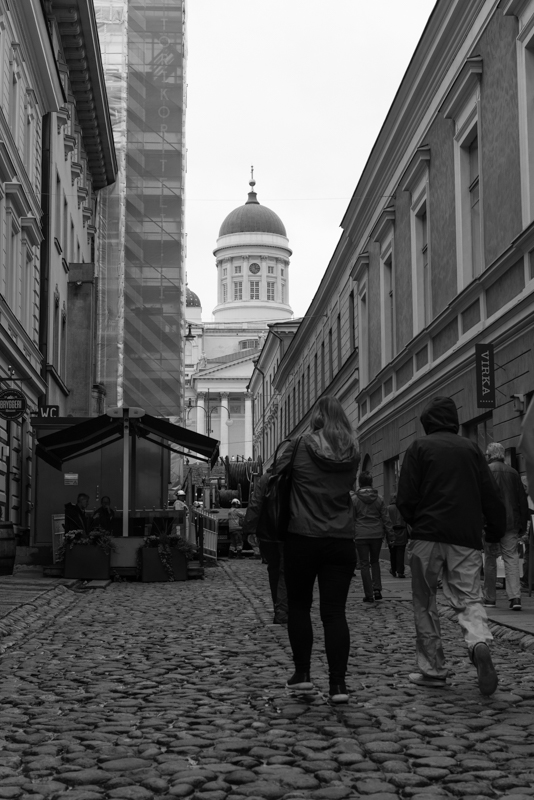
Back in July and August I got to visit Helsinki. Needless to say, I dragged my camera and lenses along and did some sightseeing. Helsinki is a relatively new but welcoming city.

July

My first trip there was in early July (7th-10th). This meant that I was there about two weeks after the summer solstice. At 60°10’ north, this has been the northernmost place I’ve ever been. (I’m not really counting the layover in Reykjavik at 63°59’ north, although I do have an interesting story about that for another time.) If you combine these two relatively boring facts (very far north and near solstice timing), you end up with nearly 19 hours of daylight! This gave me ample time to explore. Below are a couple of photos I took while there. There are more in the gallery.

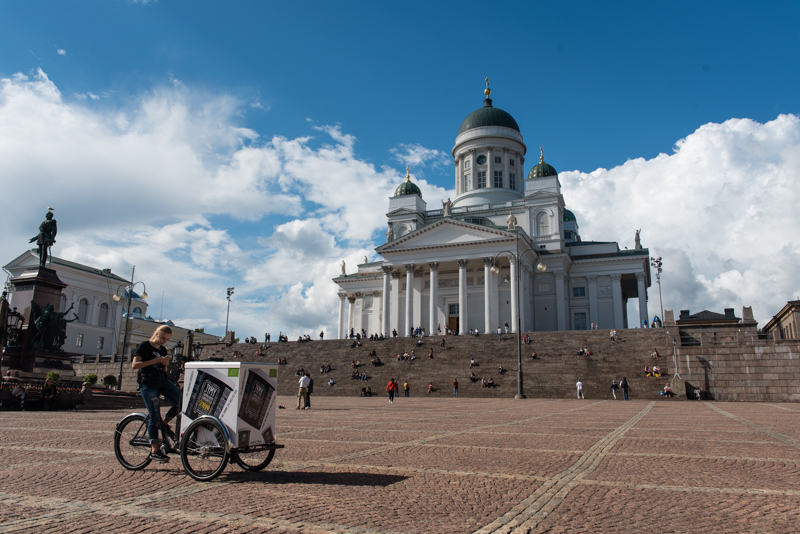
Approaching Wikipedia article: Senate Square and the Wikipedia article: Helsinki Cathedral:

The cathedral:

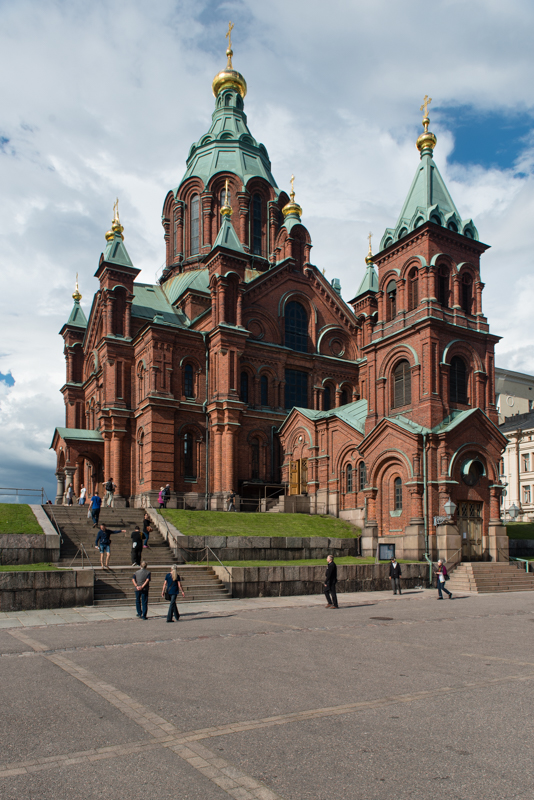
Not far from this (Lutheran) cathedral is an Eastern Orthodox cathedral—Wikipedia article: Uspenski Cathedral.

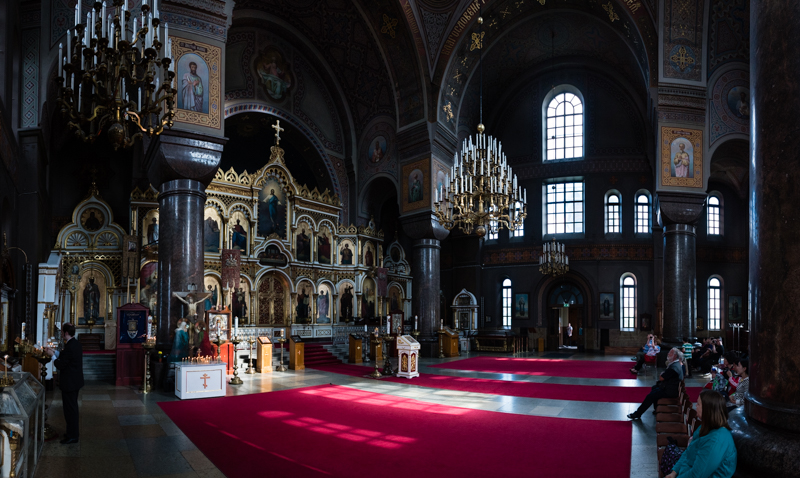
And here is its interior:

Like a number of other cities in Europe, Helsinki is filled with bikes. Most sidewalks seem to be divided into two parts—one for walking and one for biking. The public transit seems to include bike rentals. These rental bikes are very…yellow.

Suomenlinna

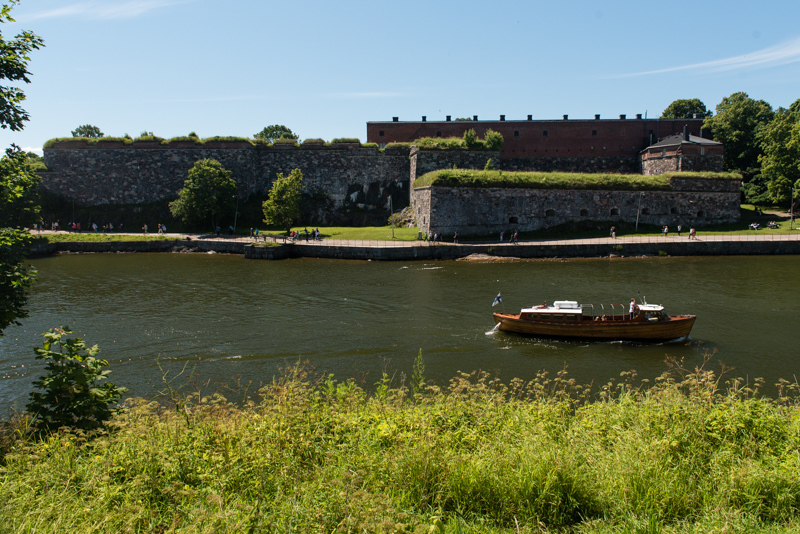
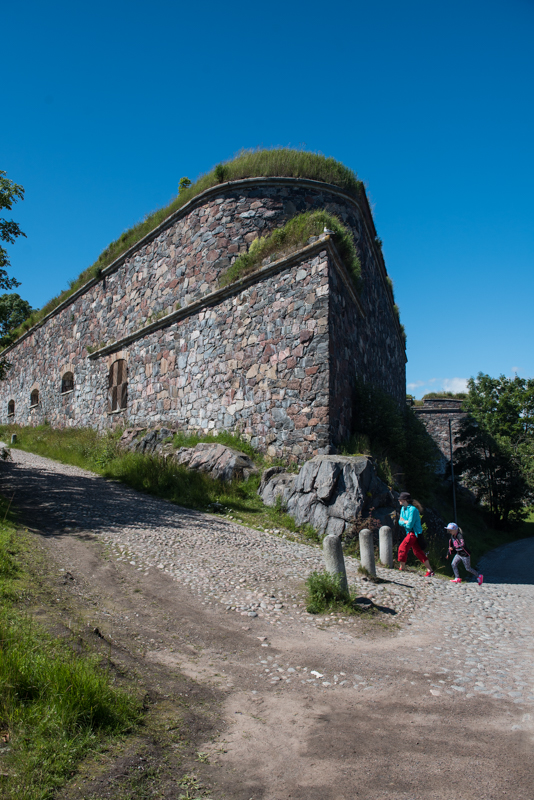
On Saturday, July 9th, I took a ferry to the nearby sea fortress—Wikipedia article: Suomenlinna—where I spent the day.

Of course there is a (small) church there. (You can also see it in the above photo in the haze.) This one has a sea-fortress-inspired chain running around it.

The whole fortress is made up of six islands. This allows you to see some of the fortifications up close as well as at some distance.

There are plenty of small buildings of various types scattered around the islands. Some of them are still used as residences, while others got turned into a museum or some other public space.

August

The August trip was longer and consisted of more roaming around the city.

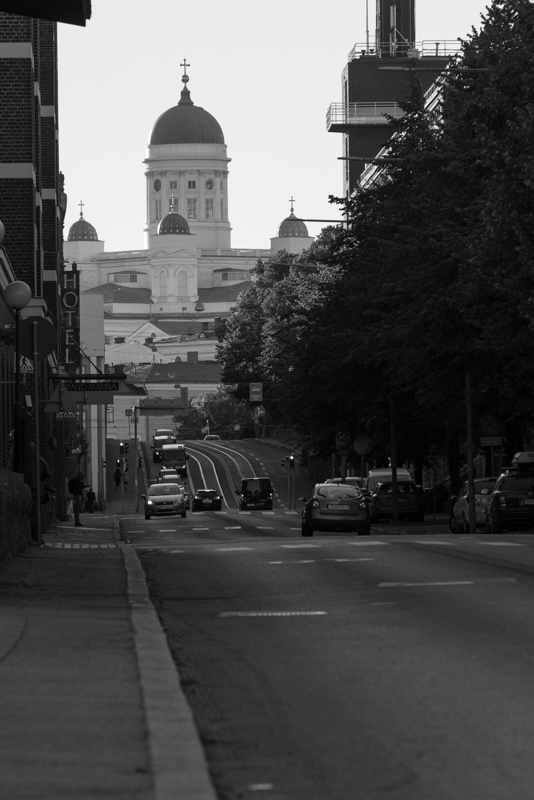
The Helsinki Cathedral in the distance.

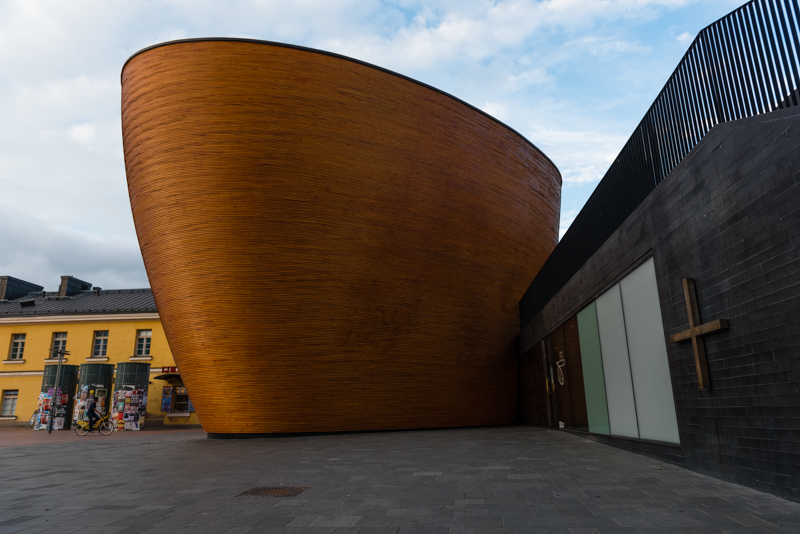
There are a fair number of churches—here is the Wikipedia article: Kamppi Chapel.

Heading west of the city center (toward Wikipedia article: Länsisatama) one cannot miss the fact that Helsinki is a coastal city.

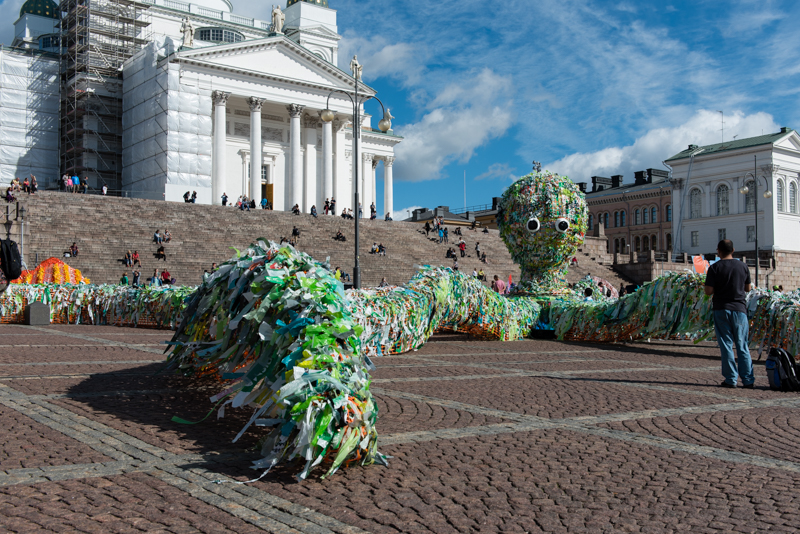
Finally, on the last day of my August trip I got to see some sea creatures right in front of the cathedral. They were made of various pieces of plastic. As far as I could tell, this art installation was about environmental awareness.

I took so long to finish writing this post that I’ve gotten to visit Helsinki again last month…but more about that in a separate post. Safe travels!

by JeffPC at February 06, 2017 11:35 PM

November 27, 2016

Eitan Adler

October 25, 2016

Josef "Jeff" Sipek

iPhone 7 "Review"

I stopped by an Apple Store nearby, and played with the new iPhone 7 for a couple of minutes. Why? I have an iPhone 5s which is still working, but it is lacking some nice-to-have features. I got the 5s back in the day because I got fed up with my Galaxy Nexus—it got unusably slow, and I wasn’t really a fan of the screen size (it was too big). That’s right, I wanted a phone screen that was smaller so I could use it with just one hand. The iPhone 5s fit the bill perfectly.

Now, it is 2016 and the 5s is getting a bit old and the 7 just came out. Should I upgrade? The iPhone 7 is better in just about every way, but the screen…it’s bigger than the 5s’s. (Yes, I realize it’s the same as the 6 and 6s.)

Trying it out

My main goal with playing with the phone at the store was to see if I was OK with the size. I made sure to type on the keyboard both one-handed and two-handed, browse some websites (mostly scrolling around), and see which screen locations were hard to reach.

The new home button is certainly interesting. It is a fingerprint reader (this is nothing new by itself) with haptic feedback. So, “pressing” it results in a similar sensation to what the physical button provided in the previous models. It’s not the same exact feel, but it was surprisingly good. It felt like the feedback was coming from near the home button, not just the whole phone vibrating.

The phone certainly felt bigger than my current one. The test drive wasn’t long enough for me to make a determination based on this alone.

One-handed operation

While playing with the phone, I made an interesting “discovery” about my one-handed use of phones. Apparently, I hold smartphones one of two ways. If I am typing, I hold the phone further down; on the other hand, if I am mostly scrolling, I hold it closer to its center of gravity. Needless to say, this affects how far on the screen my thumb can reach.

When I’m holding the phone near the center of gravity, all icons (see above screenshot) except the top row and the Maps app are easy to reach. The Mail app is essentially impossible to reach without shifting the phone in my hand. The remaining ones are doable, but it takes more effort than just moving my thumb over.

If I’m holding the phone lower down (e.g., because I was just typing), then the top two rows of icons are hard to use—with the top left corner (i.e., Mail) being impossible to reach.

There is an accessibility option (called “Reachability”) which shifts the whole screen down 30–40%. This makes the top two rows of icons reachable. (Once enabled, trigger it by double-tapping the home button.) While it is neat that this is available, it feels a bit like a hack.

Specs

When I got home, I decided to make a table of the physical specs. Specifically, the physical dimensions, weight, and the screen size. In addition to the two iPhones, I included the Galaxy Nexus (my previous phone) and the Samsung Galaxy S7 (the current flagship Samsung Galaxy phone).

Phone Size (mm) Weight Screen
iPhone 5s 123.8 x 58.6 x 7.6 112g 100mm, 1136x640
iPhone 7 138.3 x 67.1 x 7.1 138g 120mm, 1334x750
Galaxy Nexus 135.5 x 67.94 x 9.47 135g 118mm, 1280x720
Samsung Galaxy S7 142.4 x 69.6 x 7.9 152g 130mm, 2560x1440

When I first made this table, I was surprised at how close the iPhone 7 is to the Galaxy Nexus. Size-wise within a couple of mm! Weight-wise only a 3 g difference. The good news is, I can use my 2.5 years of Galaxy Nexus use as a guide to answer my question about the iPhone size. The bad news is, I didn’t really like the screen size on the Galaxy Nexus.

Conclusion

I think the conclusion is clear—I am going to wait to see if Apple makes a smaller version over the next year. Until then, I will stick with my 5s.

by JeffPC at October 25, 2016 02:29 PM

October 15, 2016

Josef "Jeff" Sipek

Septemberfest 2016 - Birds of Prey

This past weekend, the Dunstable Rural Land Trust had its annual Septemberfest event (yes, it ended up being in early October this year). Holly and I went to it armed with the cameras hoping to get some nice images of birds from the “Birds of Prey” program. We were not disappointed.

So far, I have managed to sift through only the bird photos. I still have to go through the other ones (e.g., the colorful autumn shots) and figure out which are the keepers. I set up a gallery which I’ll update with the non-bird photos in the near future.

Without further ado, here are the birds!

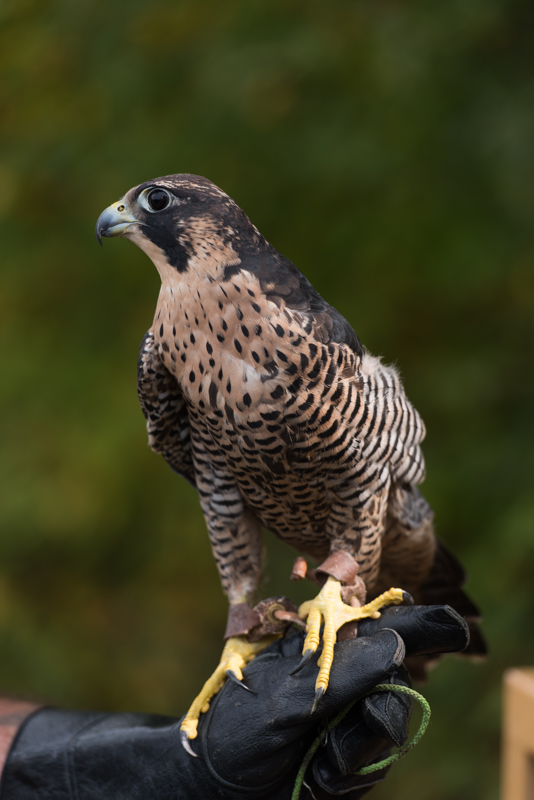
The peregrine falcon:

The screech owl:

The great horned owl:

The Harris’s hawk:

The red-tailed hawk:

The American kestrel:

The golden eagle:

This is only a fraction of the photos that are in the gallery, so make sure to check it out for more avian goodness.

by JeffPC at October 15, 2016 08:54 PM

September 26, 2016

Josef "Jeff" Sipek

First Attempt at Food Photography

Yesterday evening, I decided that making dinner and photography should be combined more often. As a result, I dragged my camera, the 70-200mm zoom, the flash, and the tripod to the kitchen to try my hand at taking some photos of scrambled eggs—or to be more specific, scrambled eggs as they were cooking.

The fully extended tripod left the Arca-Swiss plate about nose-level. With the D750 with the 70-200mm on top, the LCD on the camera was just above my head. The swiveling LCD on the camera was rather useful and made it significantly easier to review test shots, and mess with the flash output.

As far as the food itself is concerned, I prepared two bowls—one with five cracked eggs, and the other with some shredded ham slices and swiss cheese slices.

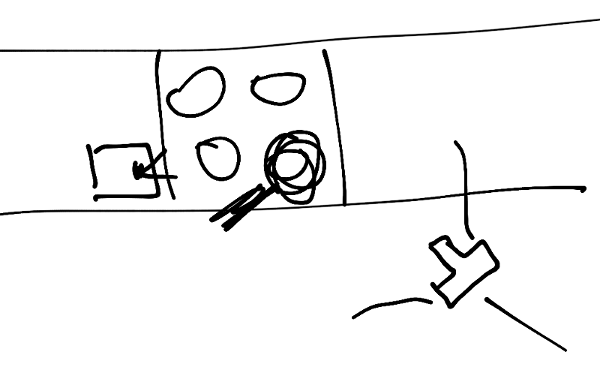
Here is a (terrible) diagram showing the setup from above to better explain it.

The four-circle thing in the middle is the stove, with the skillet on the bottom right burner (the scribble with a handle sticking out). The camera on the tripod is in the bottom right corner of the diagram. To the left of the stove is the flash. It’s on top of a cardboard box that the 70-200mm came in. Above the stove is a stove hood with a couple of lights pointing down at the stove top.

I used a wooden spatula in the otherwise empty skillet to have something to focus on. After I got the focus right where I expected the food to be, I switched to manual focus. In the process of taking those test shots, I ended up concluding that I need both the flash and the stove hood and kitchen lights to get something resembling the right kind of lighting. Of course the kitchen light color temperature did not match the flash, so I grabbed the orange gel and put it on the flash. (This is the first time I used a gel on a flash!) It worked.

It was time to start cooking! Once the bacon grease on the skillet got hot enough, I poured the eggs in, and quickly moved to the camera to get some more test shots—to make sure that the exposure, focus, and composition were good. I ended up tweaking the focus and flash output.

After I scrambled the eggs a little, I dumped the ham and cheese on top and moved it around a bit to avoid a large mountain of ham and cheese. Then it was time to go back to the camera—to get the final shots.

Even though I was zoomed in near 200 mm, I ended up cropping significantly to get the shot I wanted. I suppose this would have been a good time to use a macro lens (which I do not have).

I set up a gallery for my food photography, but so far the only image there is the one above. Obviously, this means that I have to take more food photos. :)

by JeffPC at September 26, 2016 01:51 PM

September 15, 2016

Josef "Jeff" Sipek

Changing timezone in irssi at runtime

About a year ago, I moved my irssi-in-a-screen into a separate zone on my server. I installed the new zone, installed screen and irssi inside it. And started it all up. After a little while, I realized that the zone was set to UTC. (By default, OmniOS zones start with their timezone set to UTC.) That’s easy enough to change by editing /etc/default/init and restarting anything that has the timezone cached in the environment. Which includes irssi. In general, I don’t like restarting irssi because it is a bit of a pain to rejoin the channels I want to be in temporarily.

Well, it turns out that there is a way to change irssi’s timezone setting at runtime!

/script exec $ENV{'TZ'}='EST'

I definitely did not expect something like this to work, but it does. (Yes, yes, I know this is on the irssi tips and tricks page.)

by JeffPC at September 15, 2016 09:44 PM

September 14, 2016

Josef "Jeff" Sipek

bool bitfield:1

This is the first of hopefully many posts related to interesting pieces of code I’ve stumbled across in the dovecot repository.

Back in 1999, C99 added the bool type. This is old news. The thing I’ve never seen before is what amounts to:

struct foo {
	bool	a:1;
	bool	b:1;
};

Sure, I’ve seen bitfields before—just never with booleans. Since this is C, the obvious thing happens here. The compiler packs the two bool bits into a single byte. In other words, sizeof(struct foo) is 1 (instead of 2 had we not used bitfields).

The compiler emits pretty compact code as well. For example, suppose we have this simple function:

void set(struct foo *x)
{
	x->b = true;
}

We compile it and disassemble:

$ gcc -c -O2 -Wall -m64 test.c
$ dis -F set test.o
disassembly for test.o

set()
    set:     80 0f 02           orb    $0x2,(%rdi)
    set+0x3: c3                 ret

Had we used non-bitfield booleans, the resulting code would be:

set()
    set:     c6 47 01 01        movb   $0x1,0x1(%rdi)
    set+0x4: c3                 ret

There’s not much of a difference in these simple examples, but in more complicated structures with many boolean flags the structure size difference may be significant.

Of course, the usual caveats about bitfields apply (e.g., the machine’s endian matters).

by JeffPC at September 14, 2016 02:10 PM

September 13, 2016

Josef "Jeff" Sipek

Sunset over Mount Monadnock

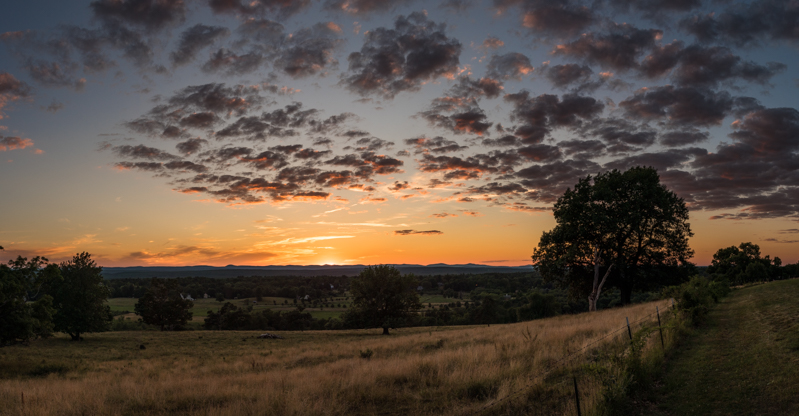
Back at the end of June, I hiked up the nearby Gibbet Hill in Wikipedia article: Groton to watch the sunset and get some nice shots of the western sky. (gallery)

Both times I went, I arrived about 20 minutes before the sunset, and got situated. Once the actual sunset started happening, it was a matter of a minute or two before the sun was gone.

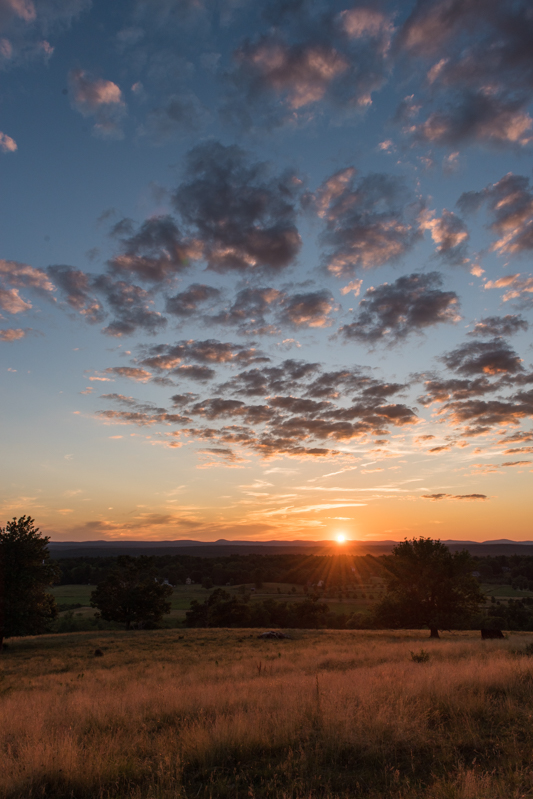
Just before sunset @ 24mm:

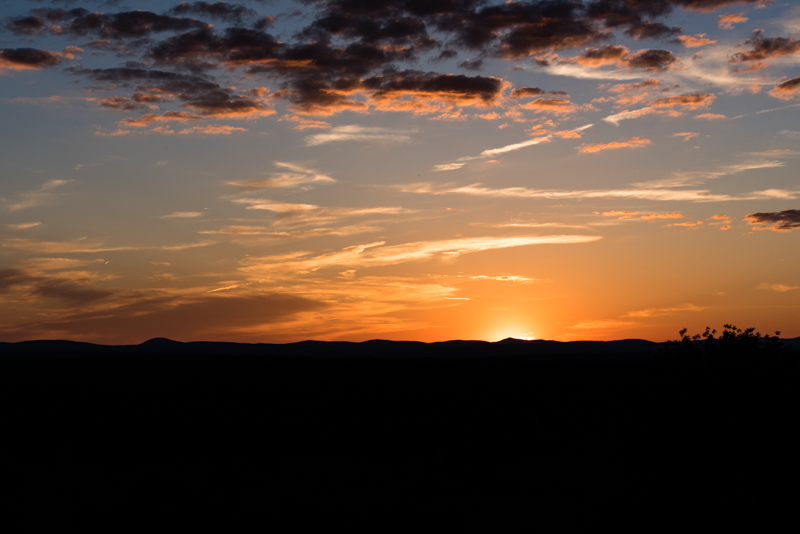
Sunset @ 70mm:

The peak that the sun sat behind is Wikipedia article: Mount Monadnock—about 50 km from Groton.

I took a couple of panorama shots. I like this one the best (6 shots):

While hiking up the hill, I spotted this tree against the colorful sky. I had to get a silhouette:

I was surprised at how little time the entire trip took. From leaving the house to getting back, it was about 70 minutes. This is certainly a quick photo shoot compared to the day-long trips like the one to Boston in early June ([1,2,3]).

by JeffPC at September 13, 2016 03:08 PM

September 12, 2016

Josef "Jeff" Sipek

Working @ Dovecot

It’s been a hectic couple of weeks, and so this post is a bit delayed. Oh well.

A couple of months ago, I decided that it was time for me to move on work-wise. As a result, four weeks ago, I joined Dovecot Oy (a part of Open-Xchange).

As you may have guessed from the name of the company, I get to spend my time making the Dovecot email server code better, more featureful, and otherwise more excellent. It is certainly a significant but fun change—going from kernel hacking on a fairly unknown operating system to hacking on the world’s most popular IMAP server. Not a day goes by where I’m not surprised just how much functionality is in the Dovecot codebase, or when I get to consult an RFC related to some IMAP extension I didn’t even know existed.

So, with this said, you should expect to see some posts related to Dovecot, Dovecot code, and email in general.

by JeffPC at September 12, 2016 04:21 PM

August 11, 2016

Josef "Jeff" Sipek

Stellafane (2016)

Last weekend we drove to Wikipedia article: Springfield, VT to attend the Stellafane Convention. In short, it’s two and a half days of camping, astronomy and telescope making talks, and of course observing. I brought my camera (D750), two lenses (24-70mm f/2.8 and 70-200mm f/2.8), and a tripod. Over the two and a half days, I ended up taking 400 shots of just about everything of some interest. I post processed about 60 and created a gallery. I’m going to include only some in this post, so make sure to check out the gallery for more shots that just didn’t fit the narrative here.

Thursday

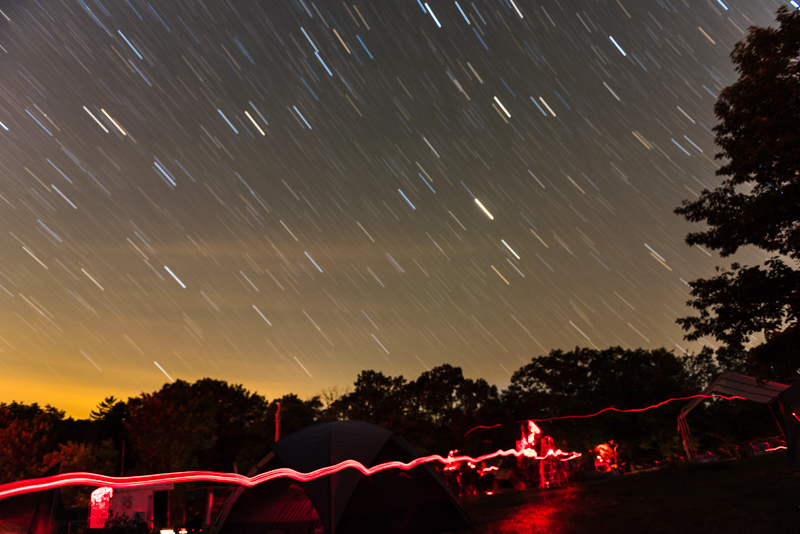
Thursday was mainly about arriving in the late afternoon, setting up the tent, and doing some observing once it got dark. Photography-wise, my primary goal for Thursday was to get some sky images at 24mm. I tried some long exposure (657 seconds) to get some star trails:

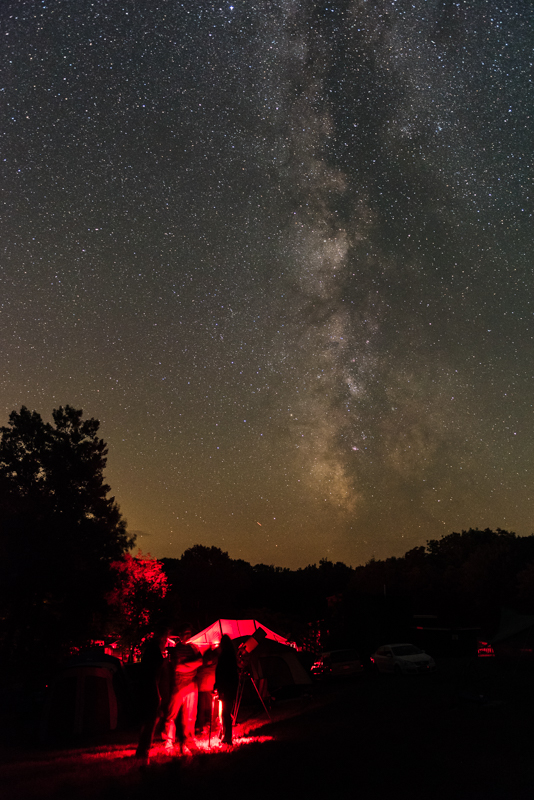
There was a decent number of people walking around with red lights (so as not to destroy night vision), so a number of my shots ended up with some red light trails near the ground. (That’s that wobbly red line.)

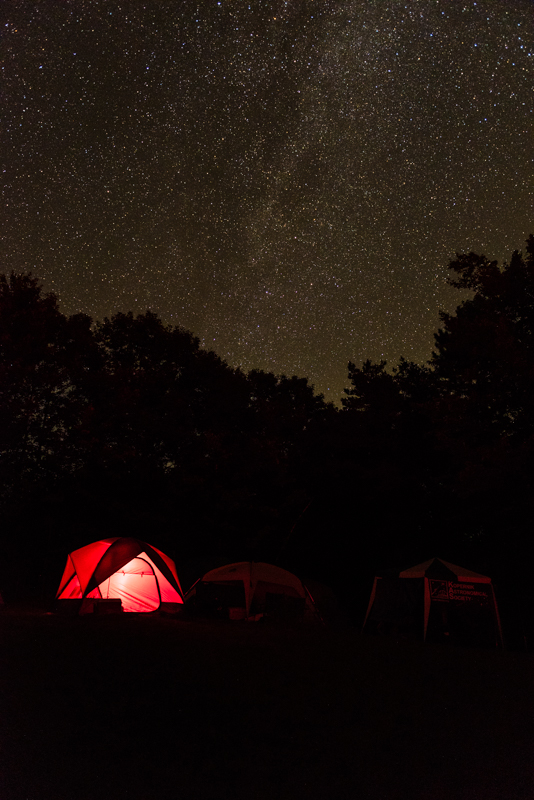
I also took a decent amount of short exposures (10-16 seconds). At 24mm on the D750, 13 seconds seems to be just about when stars start to turn into trails.

This is the only staged shot—I intentionally left one of our red flashlights on in the tent to provide something interesting in the foreground.

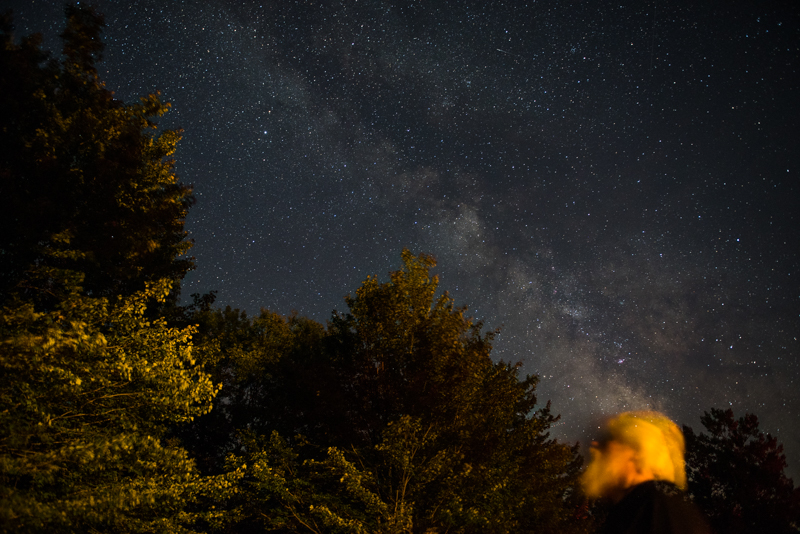
Here is our tent-neighbor and friend looking up at the sky. He didn’t actually know that I was taking a shot of the milky way, and I didn’t realize that he managed to sneak into the frame. The trees got lit up by some joker driving around with headlights on. I expected that to ruin the shot, but it actually worked out pretty well.

Friday

Friday is the first full day. I started it by hiking to the other side of the site, which not only sports a nice view, but also nonzero phone and data coverage:

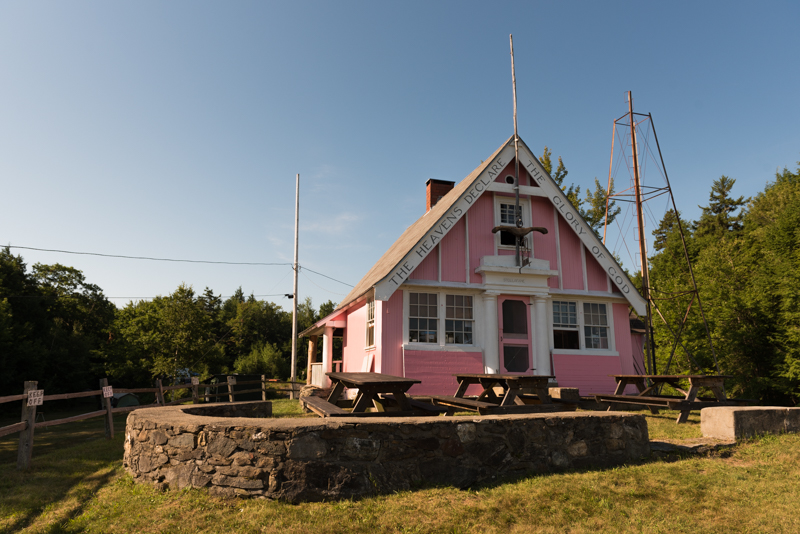
The original club house is there as well in all its pink glory:

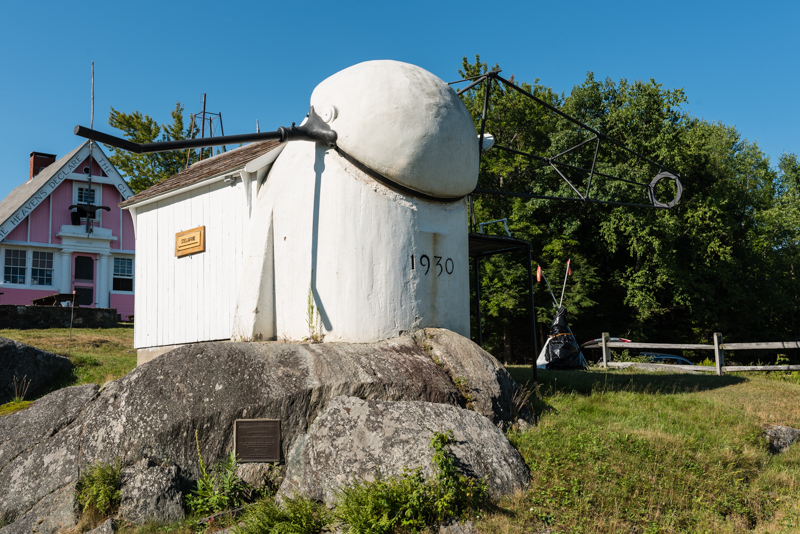
The last, but not least, building there is the turret solar telescope:

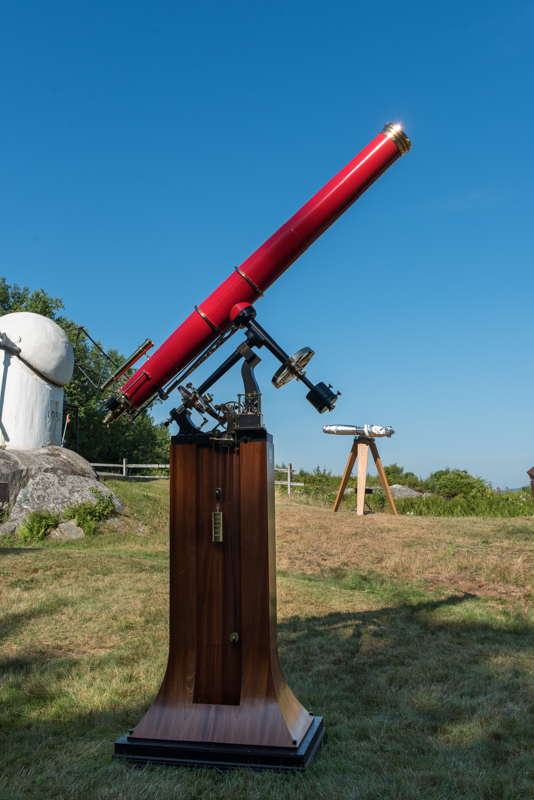
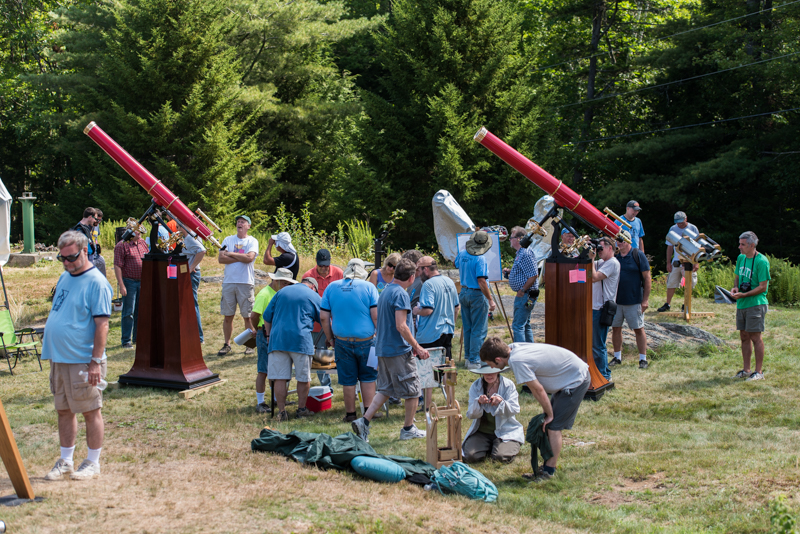
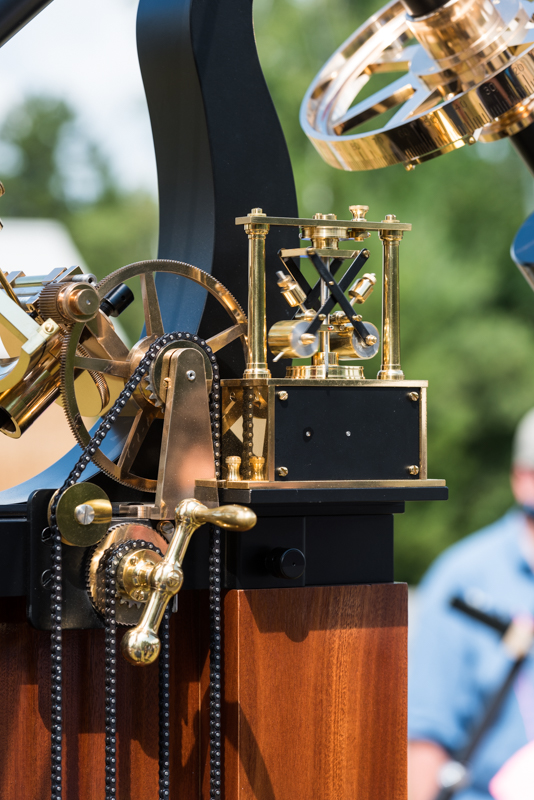
Right next to it is the location of the amateur telescope contest. Yes, people build their own telescopes and enter them into a competition to see whose is the best. This year, the most eye grabbing (in my opinion) was a pair of scaled down reconstructions of the 8-inch Alvan Clark refractor. Here’s one of them:

I couldn’t resist taking a couple of close-up shots:

Heading back toward the main site, I walked past the observatory set up in such a way as to be handicap accessible:

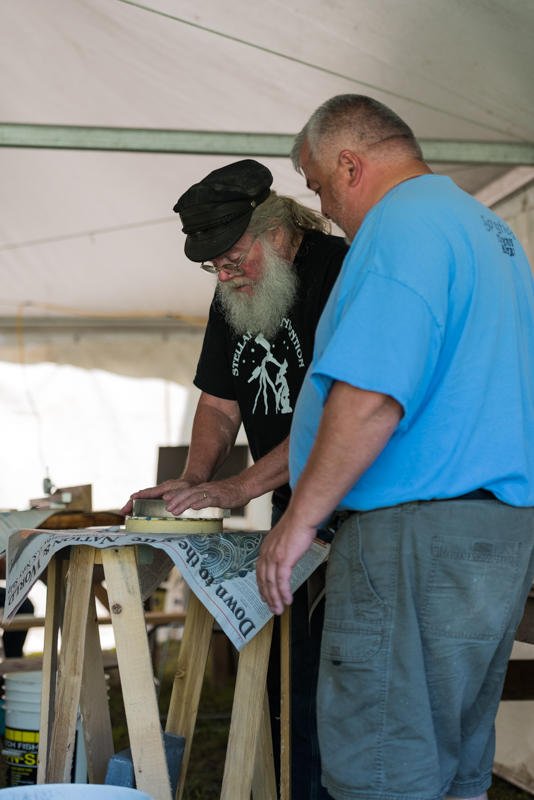
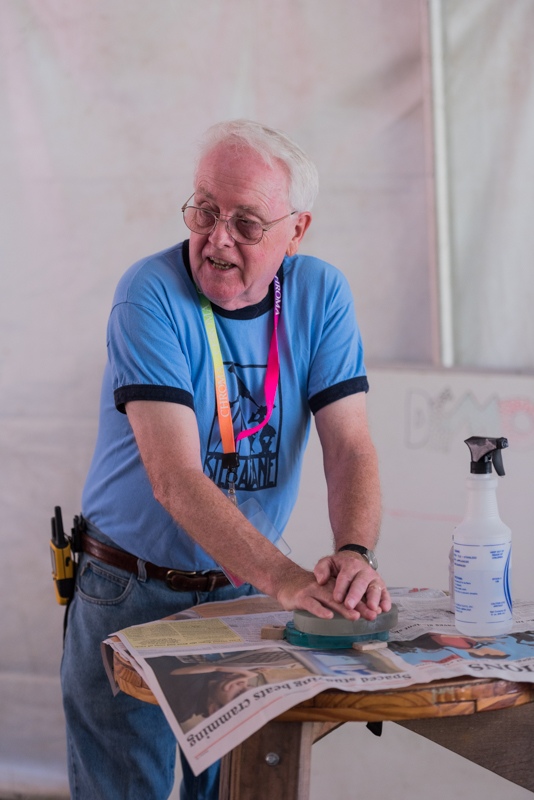
After a breakfast, it was time to go off to the mirror making tent. I think that every year, there is a series of talks and demos about how to make your own telescope mirror.

The speaker letting an attendee give mirror grinding a try:

And a close-up of the eventually-to-be-mirror on top of the grinding tool:

Fine grinding demo using a glass grinding tool instead of the plaster one:

After lunch, there was a series of talks about a lot of different topics—ranging from digital imaging, to “crowd-sourced” occultation timing.

Between talks, I noticed that one of the attendees erected Federation flags in front of his tent:

Once night rolled around, it was time for more observing. I took a number of milky way shots. They all look a bit similar, with the only real difference being what is in the foreground. Of all of them from this night, I think this is my favorite—there were a couple of people standing around a telescope talking with their flashlights on.

Saturday

The second full day of the convention began with mechanical judging of the telescopes.

Somehow, I ended up drawn to the twin-scopes; here’s another detail shot. You can see a little bit of motion blur of the governor:

The day program was similar to Friday’s—the mirror making talks and after lunch a set of talks on various topics.

The evening program consisted of the keynote, raffles, competition results, and other customary presentations. The sky was completely covered with clouds till about 1am at which point it started to be conducive to stargazing. Oh well. Two clear nights out of three is pretty good.

Sunday

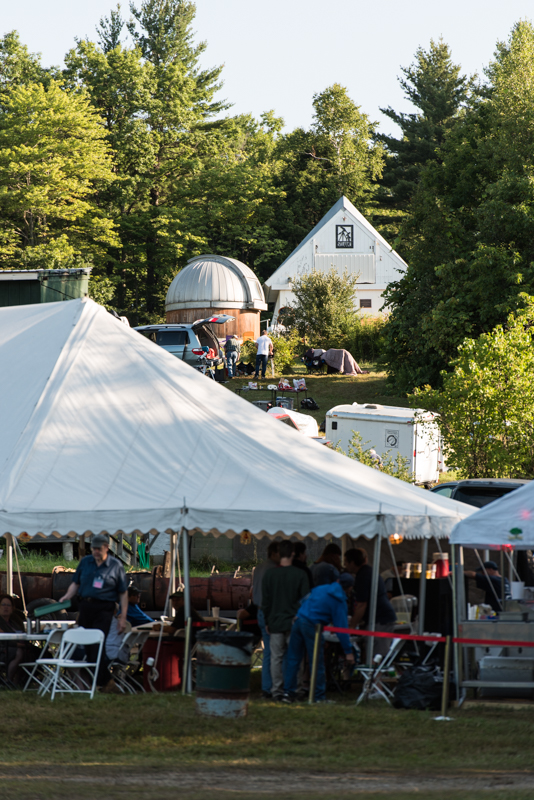
Sunday is all about packing up and heading home. During breakfast time, I ended up walking around a bit and I got this image—with the food tent in the foreground, the handicap accessible observatory near the background, and the McGregor observatory with a Schupmann telescope in the very background.

So, that’s how I spent the last weekend. I’m already plotting and scheming my next astrophotography adventure.

by JeffPC at August 11, 2016 09:30 PM

July 10, 2016

Nate Berry

Fix for Firefox typing delay and slow scrolling

I frequently boot Arch Linux from a USB3 drive in various Intel based machines which I’ve discussed here before. Recently I was using the drive in a Dell e7240 which is a fairly nice, if older, Core i5 based ultrabook and although the drive was inserted in the USB port marked SS (USB3) performance in …

by Nate at July 10, 2016 12:53 AM

July 01, 2016

Josef "Jeff" Sipek

2015 Lunar Eclipse

You may remember that there was a lunar eclipse back on September 27th, 2015. That evening, I set up our 90mm refractor telescope (1000mm focal length, f/11) in the driveway and spend a fair amount of time sitting on the ground. I used a t-mount adapter to mount my Nikon D70 instead of an eyepiece—effectively using the telescope as a big lens. (This is called prime focus photography.) Every minute, I took a shot of the moon hoping to make a collage. It took me nine months, but I finally remembered to do it.

(4 MB full size image—8750 by 1750 pixels)

To keep the overall image aspect ratio reasonable, I ended up using every sixth image. Therefore, each step is six minutes apart and the whole sequence spans about 42 minutes. Each of the photos was taken at ISO 1600, which the D70’s CCD does not handle very well, hence the noise.

I am looking forward to the next total lunar eclipse. It should be a whole lot easier to do with a modern camera like the D750. Sadly, it will be a while before there is another total lunar eclipse on the east coast of United States.

by JeffPC at July 01, 2016 01:29 PM

June 21, 2016

Josef "Jeff" Sipek

D750 Star Trails

I have tried star trails photography once before—7 years ago. Back then I was using the D70 which was a good camera but there were two problems with it for astrophotography: first, its CCD sensor wasn’t the best at higher ISOs, and second, long exposures were not possible because of some interference (thermal or electric) which resulted in ugly purple fringing. That experience made me not really bother with astrophotography—hence the seven-year hiatus.

A week ago I decided that I should try again with my D750 and the 24-70mm f/2.8 lens. Since they are both significantly newer than my old setup and are superior in just about every way, I thought why not try again and see exactly how much better the results would be.

I ended up with only three shots worth sharing. As always, I made a gallery with them. The one difference from the other photo galleries I make is that I will continue to add star photos to this gallery until the end of the year (when I plan to make a 2017 gallery).

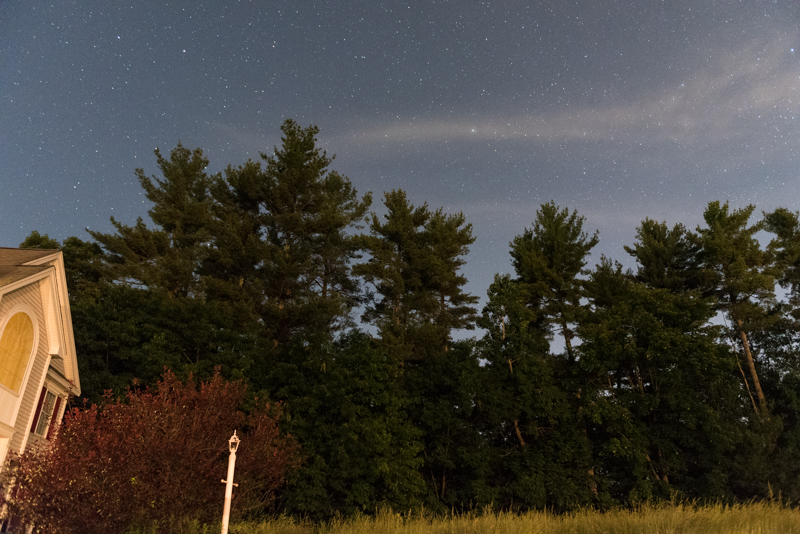
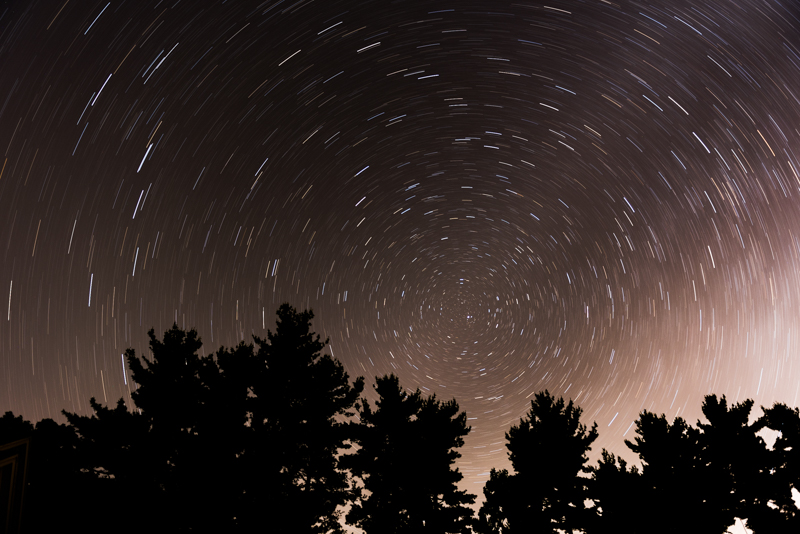
After setting up the camera in the general direction of Polaris, I needed to figure out the exposure. So, I cranked up the ISO to 10000 and took a 5 second test shot at f/2.8. The hope was to see how the sky exposed, and then “trade” the ISO for time to get the same exposure but less noisy and with star trails. (E.g., changing the ISO from 10000 to 160 is 6 stop difference, so the shutter speed needs to change 6 stops in the other direction to compensate. That is from 5 seconds to 320 seconds.) When I viewed the image on the back of the camera, I was blown away:

While there is certainly noise in the image (which you can’t see in the resized version) and the composition is not great, it’s cool how both the foreground and the sky are equally well exposed. The trees are essentially light-painted by the neighbor’s driveway lights which were on at the time. And before you ask, no, that’s not the milky way, that’s just a wispy cloud.

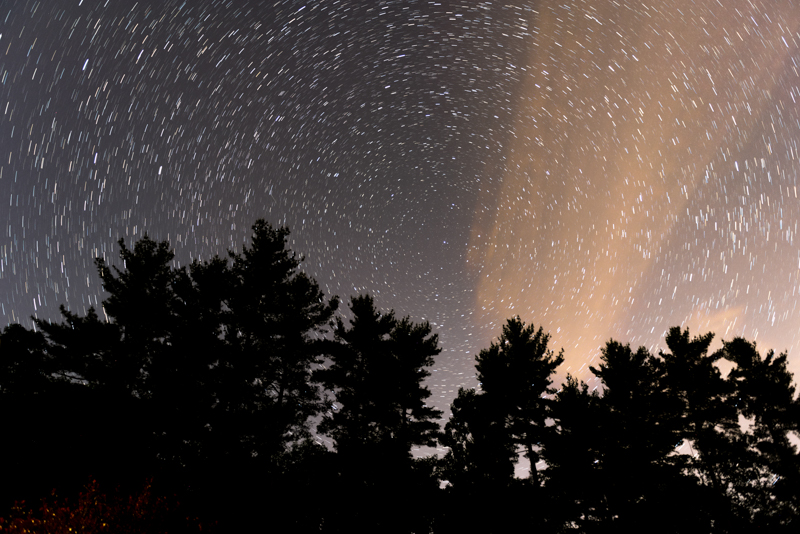
Then, I proceeded to take a back-to-back series of 15 second exposures. After five minutes (21 shots), I was sufficiently bored to try something else. After heading back inside, I stacked the 21 shots using StarStaX. Here is the resulting image (slightly tweaked in Lightroom):

The orange blur on the right of the image is a small cloud that moved across the frame during the five minutes without me noticing. Unfortunately, there is plenty of light pollution to the northeast of us because of the neighboring city of Wikipedia article: Nashua. I am definitely going to experiment with stacking.

The final couple of shots I took were all various long exposures—ranging from 8 to 20 minutes. This is one of the 20 minute exposures:

Again, the light pollution from Nashua is unfortunate.

The 74 degree horizontal field of view at 24mm is pretty good. Of course, a wider lens would provide for an even more interesting shot. For example, a 15mm focal length would produce a 100 degree horizontal field of view. With that said, I am certainly going to experiment more with star trail photography—even if I have “only” a 24mm focal length.

by JeffPC at June 21, 2016 12:33 AM

June 18, 2016

Josef "Jeff" Sipek

Boston

Two weeks ago I ended up going to Wikipedia article: Boston for a day. I spent my day in three places—the Wikipedia article: Boston Public Library, the Wikipedia article: Massachusetts State House, and the Wikipedia article: Boston Common.

In this post, I will share my photos of anything that did not fit into the other two posts—the post with the Boston Public Library photos and the post with the Massachusetts State House. (All three posts share the same gallery.)

This is a view of the eastern end of Boston Common. There was a window at the State House that offered a good view, so I snapped it.

The weather was quite nice—low 20°C, sunny, light breeze—and so the Common was full of people enjoying the day. Both passively:

and actively:

Industry by Wikipedia article: Adio diBiccari:

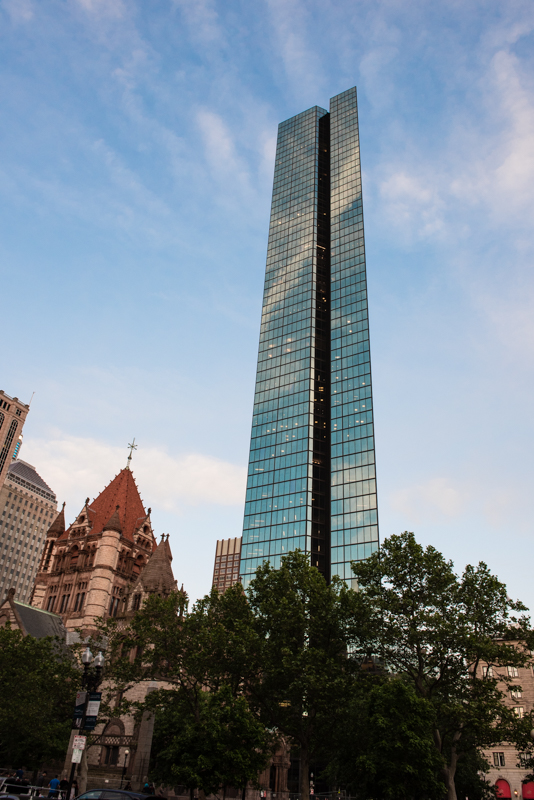
Heading back toward Copley Square and the Boston Public Library, we encounter the John Hancock tower:

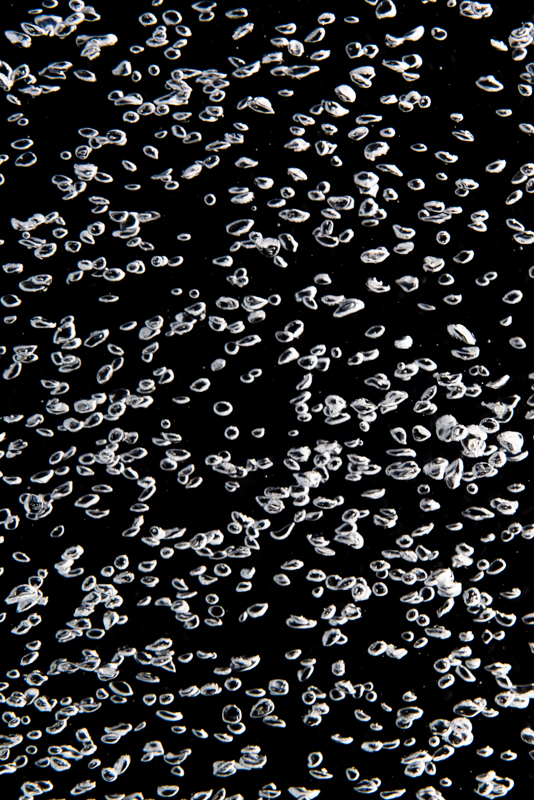
At this point, it was time to start heading back to Harvard where I left my car. I noticed an interesting ad at the bus stop right by the library. It had three panels filled with water and bubbles. I realize it isn’t the sharpest photo.

When I got off the red line at Harvard, I tried some long exposures of the trains. It turns out that unless the trains are packed, they keep their doors open for only about 10 seconds. In this 13 second exposure, you can see that the door was closed for a part of it.

An 8 second exposure worked quite well. (Unfortunately, I like the first composition better.)

So, this concludes the three post series about my one day excursion to Boston. I certainly learned a couple of things about photography in the 401 shots I took. First of all, tripods are amazingly useful indoors. Second, anyone can take a shot of a subject—it takes the “know what you’re doing” to consistently get an image that is not just good but better than average. Third, I need to read up on architecture photography before my next excursion so I know what I am doing. :)

by JeffPC at June 18, 2016 12:05 AM

Massachusetts State House

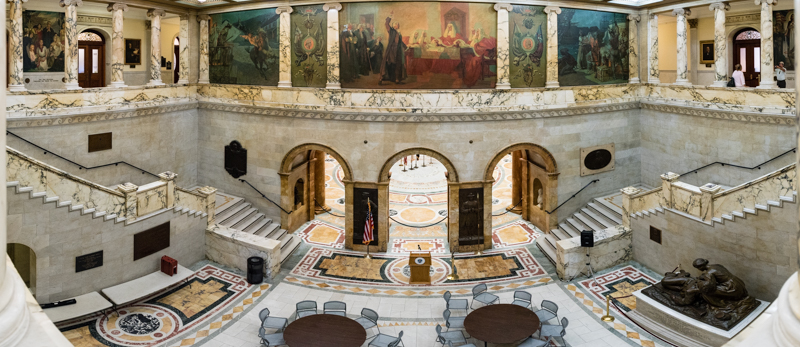
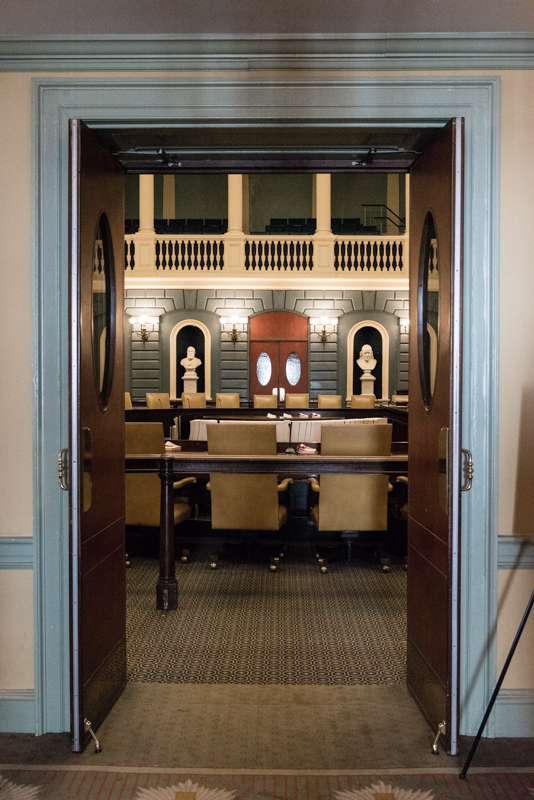
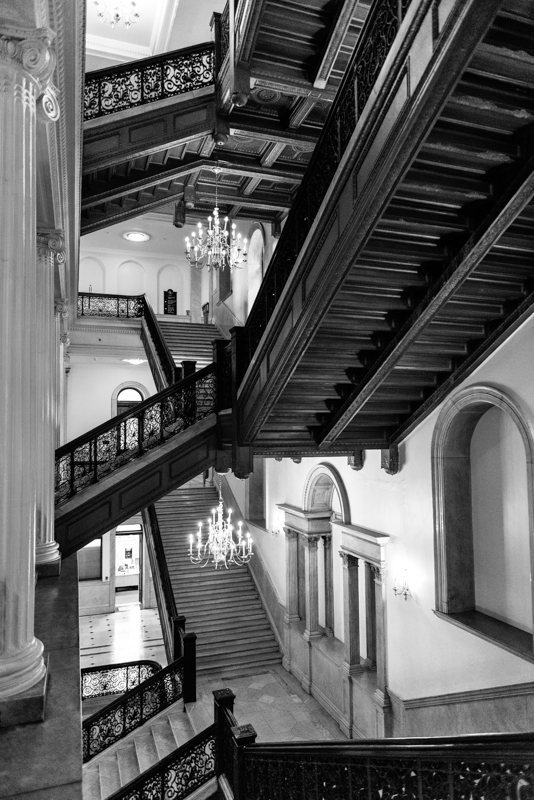
Two weeks ago I ended up going to Wikipedia article: Boston for a day. I spent my day in three places—the Wikipedia article: Boston Public Library, the Wikipedia article: Massachusetts State House, and the Wikipedia article: Boston Common.

In this post, I will share my photos of the Massachusetts State House. I have a separate post with the Boston Public Library photos and another post with the Boston Common and other places around Boston. (All three posts share the same gallery.)

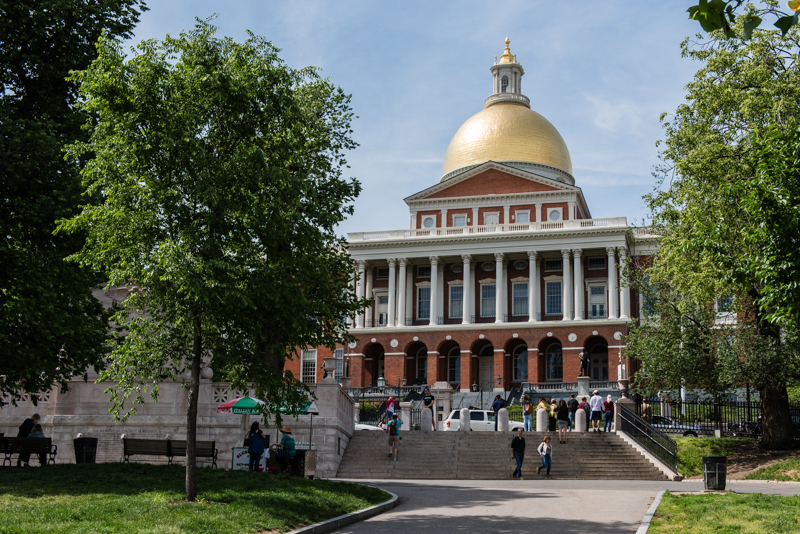
The State House with its (real) gold covered dome:

Nurses Hall (24 MB panorama):

One of the entrances into the Senate room:

And its interior (32 MB panorama):

The Great Hall of Flags. It used to be a courtyard until 1990 when they put a glass roof over it and turned it into an event space. The flags supposedly act as echo dampeners. These are the flags of the various towns in Massachusetts.

The building is filled with doors—some fancy and some rather plain:

Finally, in the very back, there is a pretty nifty staircase:

Unsurprisingly, much like at the library, I had to bump the ISO pretty high to get an acceptable shutter speed with a large enough depth of field. A tripod (or even a monopod) would have helped quite a bit. I guess I know what’s getting a higher priority on my photo gear shopping list. Additionally, I should read up on architecture photography before the next major trip.

by JeffPC at June 18, 2016 12:05 AM

Boston Public Library

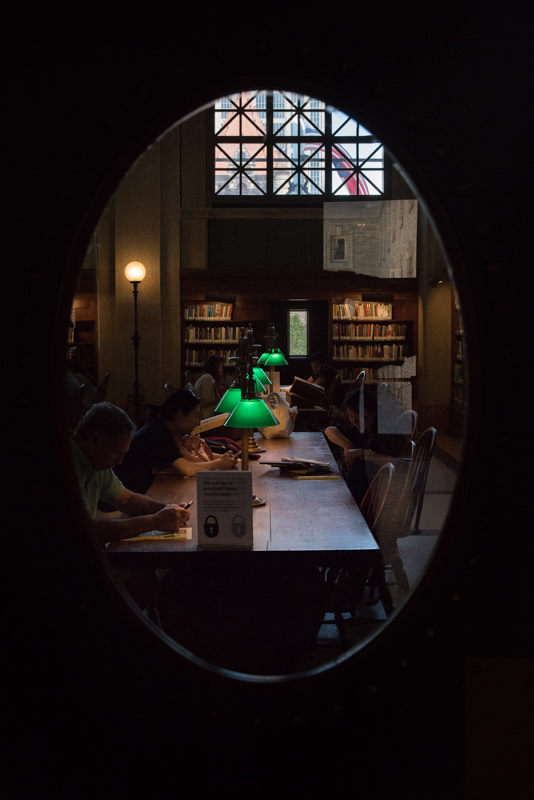
Two weeks ago I ended up going to Wikipedia article: Boston for a day. I spent my day in three places—the Wikipedia article: Boston Public Library, the Wikipedia article: Massachusetts State House, and the Wikipedia article: Boston Common.

In this post, I will share my photos of and around the Boston Public Library. I have a separate post with the State House photos and another post with the Boston Common and other places around Boston. (All three posts share the same gallery.)

The front entrance to the library:

A 180° view of the front of the building (32 MB panorama):

A peek into the reading room—Bates Hall:

Bates Hall in all its glory:

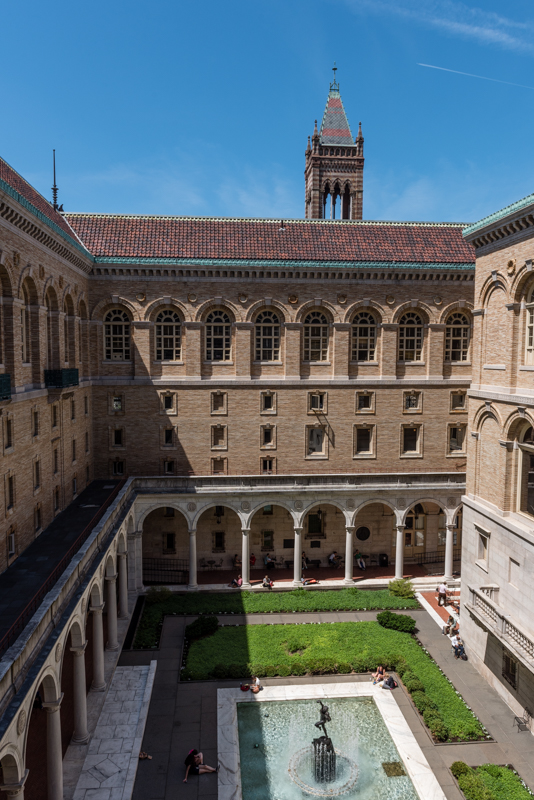
The library has a courtyard with a water fountain. The tower in the background is the tower of the neighboring Wikipedia article: Old South Church.

A close-up of a card catalog.

There are actually two churches right next to the library. Right across the street from the main entrance is the Wikipedia article: Trinity Church.

The other is the aforementioned Old South Church on the north side of the library. Toward the end of the day, it ended up backlit creating a neat silhouette.

This was really the first time I actively tried architecture photography. Shooting indoors around f/8 without a tripod was not the best thing for image quality. To keep the shutter speed in a reasonable range, I had to bump up the ISO resulting in a bit of noise. I will know what to expect next time I try this.

by JeffPC at June 18, 2016 12:05 AM

June 08, 2016

Josef "Jeff" Sipek

Memorial Day (2016)

Wikipedia article: Dunstable has an annual Memorial Day parade. Since Dunstable isn’t a very big town, the parade is not very big, but it is still nice to go to and enjoy the small-town atmosphere. This year was very overcast which made for really boring skies. As a result, I ended up with only eleven shots worth sharing. You can see all of them and the metadata in the full gallery.

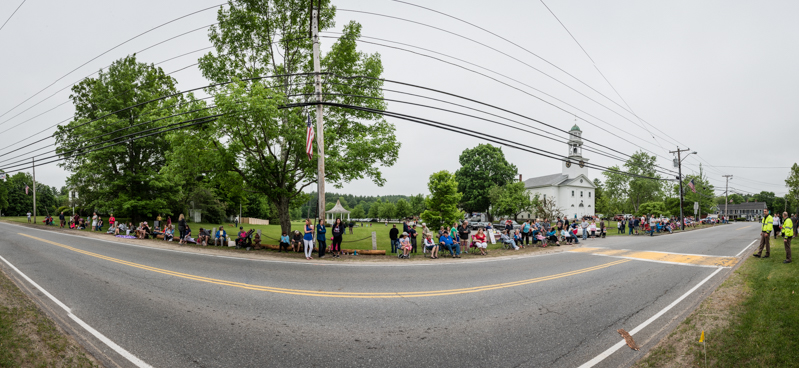
The crowd begins to gather in front of the town hall (a 7-shot panorama):

The parade proceeding to the town hall:

Some cars and trucks were part of the parade. There was an old school military jeep, some sort of big military truck, as well as the Dunstable fire department’s truck.

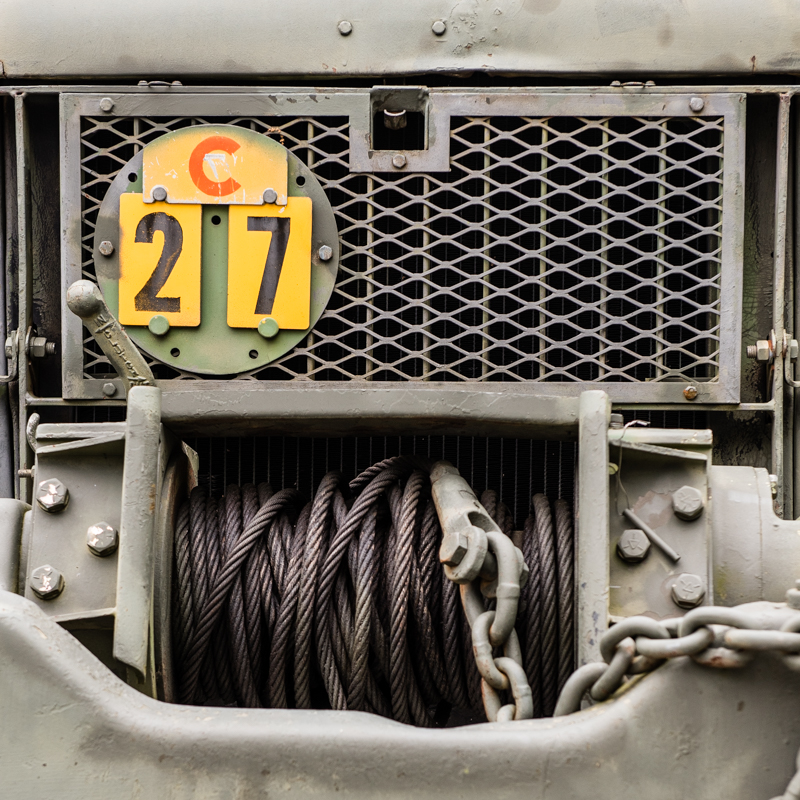
A closeup of the military truck’s winch and grill:

The fire department’s truck:

The parade stopped in front of the town hall for a couple of speeches and placing of wreaths at the war memorial right on the lawn.

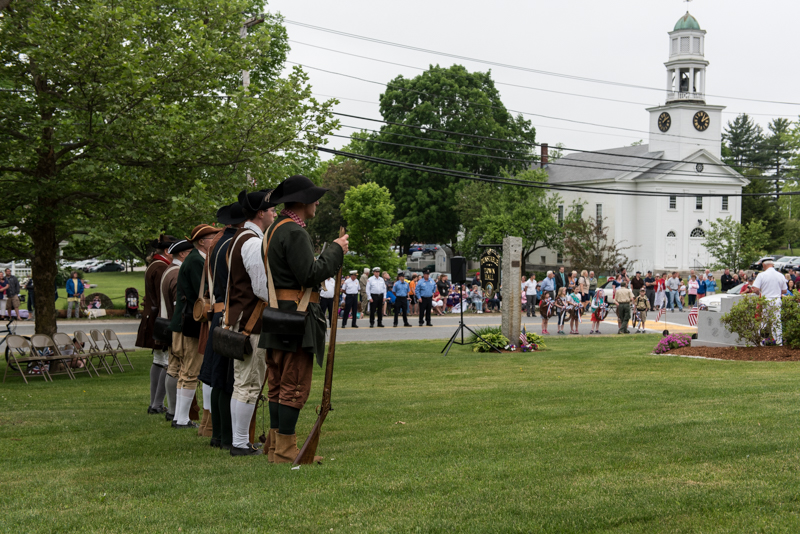
After about 20 minutes, the ceremonies concluded with a salvo from the reenactors. I got lucky and even though I wasn’t anywhere near them, I managed to capture the moment. (I was on the other side of the lawn from them and I only had the 24–70mm f/2.8 lens. This is why the foreground is a bit cluttered with the flag pole and the memorial itself.) Apparently, the folks in the foreground did not expect a loud boom.

A crop showing just the interesting part. I like how the different guns are at different stages of firing.

Technically, the parade moved on to the Central Cemetery, but I had errands to run so I left.

by JeffPC at June 08, 2016 02:56 PM

June 04, 2016

Josef "Jeff" Sipek

Battle Road Trail Walk

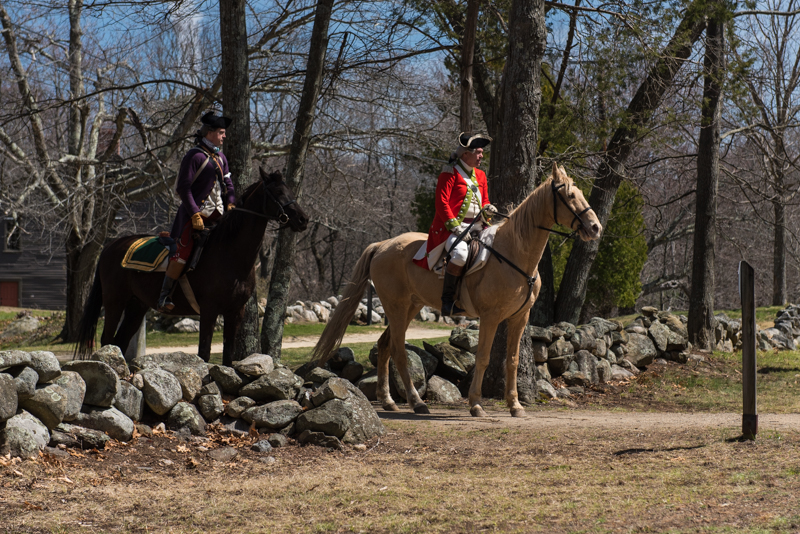
Last weekend Holly and I braved the 35°C weather, and drove to the Minute Man National Historical Park for their Battle Road Trail Walk—a three and a half hour walk covering almost 7 km of the Battle Road trail.

Naturally, I brought my camera. Unfortunately, because of the terrible heat, I didn’t take all that many photos. Of the ones I did take, I think only five are worth sharing. I am including them all in this post, but you can check out the gallery for the photo metadata.

The walk began at Meriam’s Corner, where on April 19, 1775 the locals attacked the British column returning from Concord and drove them all the way back to Boston. This is the beginning of “Battle Road”.

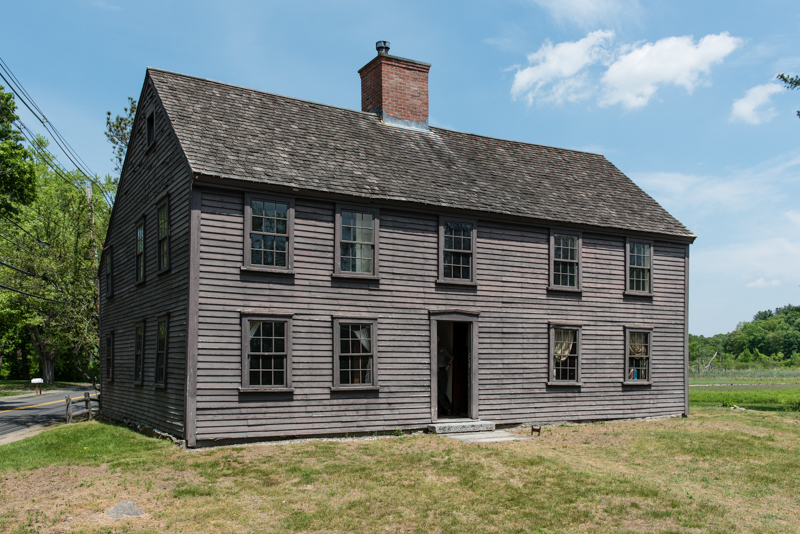
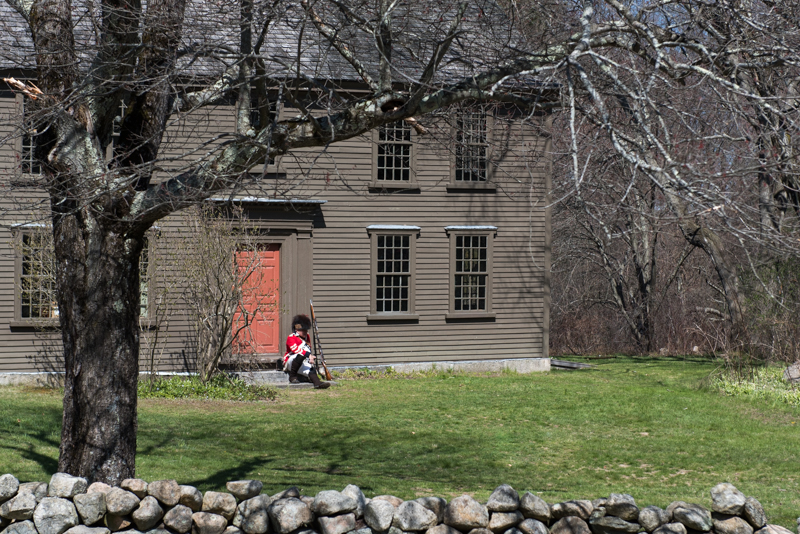
This is Nathan Meriam’s house—standing right next to where the attack began.

Despite the heat, we were only two of about 35! We were shocked to see that most people decided to show up to a 7 km walk in 35°C heat with barely 500 ml of water per person. (We knew better and brought a little over 4 liters for the two of us. And we had a stash of sports drinks in the car.) We were surprised nobody passed out along the way…or at least we did not notice anyone passing out :)

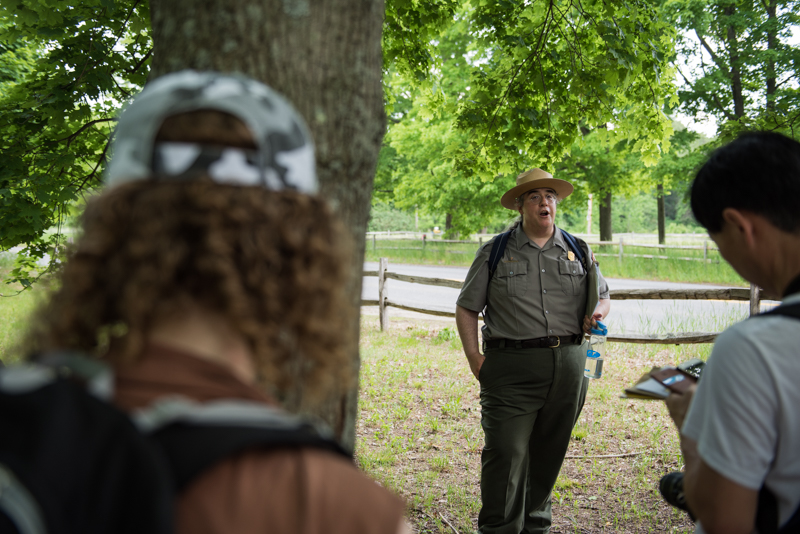
Here is park ranger Jim Hollister, our guide for the walk, mid-sentence near Hardy’s Hill. (I know, not the most flattering of photos.)

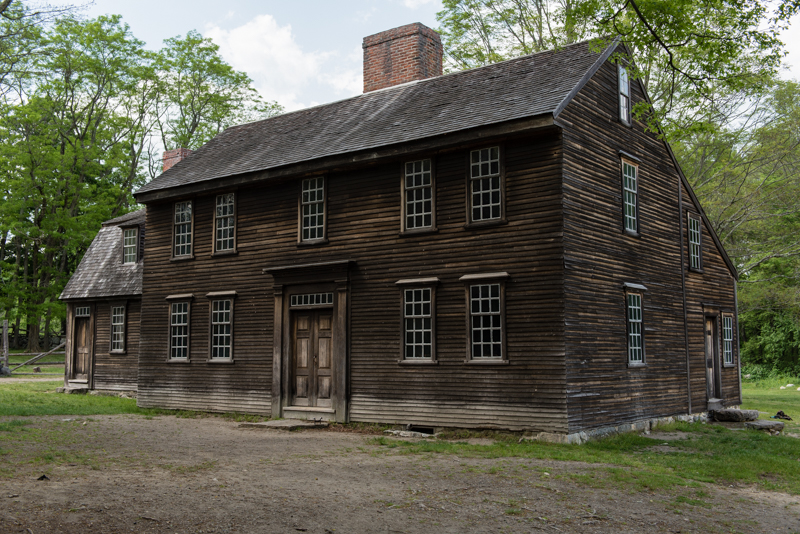
Hartwell Tavern is a little past the half-way point of the walk. The whole group took a break here so I had a few minutes to kill—and I did that with photography!

First of all, the tavern itself:

And an 8-shot panorama of the tavern and some of the walk participants. (38 MB full size panorama)

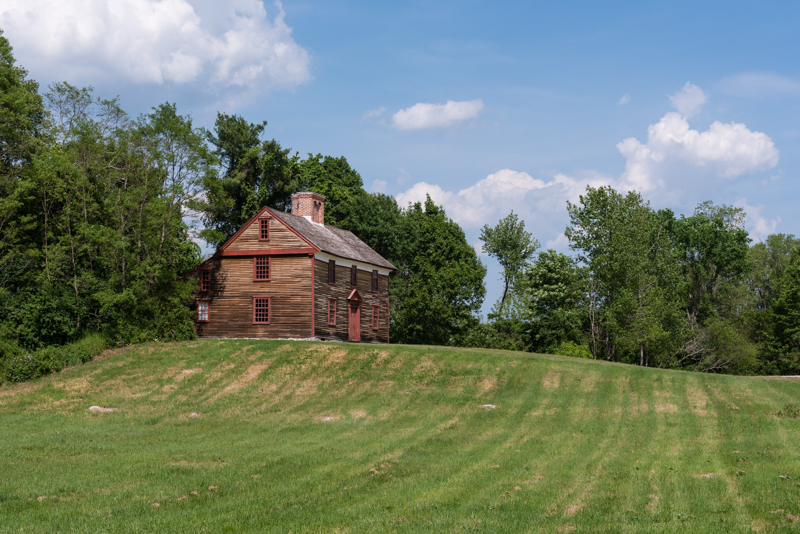
And the last photo from the trip is the Captain William Smith house (in Wikipedia article: Lincoln, MA).

As I said earlier, I did not take that many photos. I will try to do better in the future. :)

by JeffPC at June 04, 2016 06:33 PM

June 03, 2016

Josef "Jeff" Sipek

Wannalancit Mill

As you may or may not know, Nexenta has a small office in Massachusetts, and so I end up in Wikipedia article: Lowell a couple of times a week. Lowell is a decent size city with a history of textile production. As a result, the city is peppered with old mills, most of which have been converted to office and apartment buildings and a couple serve as museums.

The Wannalancit mill is one of the mills that ended up turning into an office building. (It is connected to the adjacent Suffolk mill so I often forget that technically they are separate buildings. You’ve been warned.)

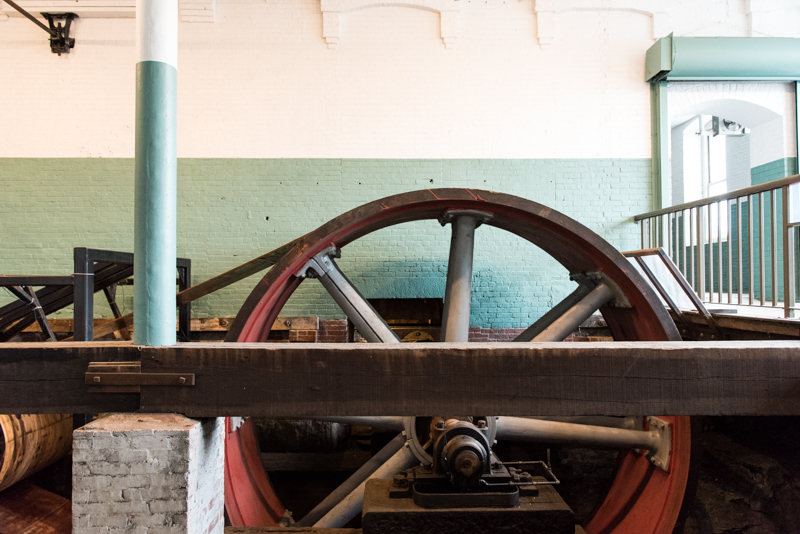
The thing that makes this mill more interesting is that the National Park Service maintains an operational water turbine in the basement. The turbine turns a large flywheel (I am guessing it is about 5 m in diameter).

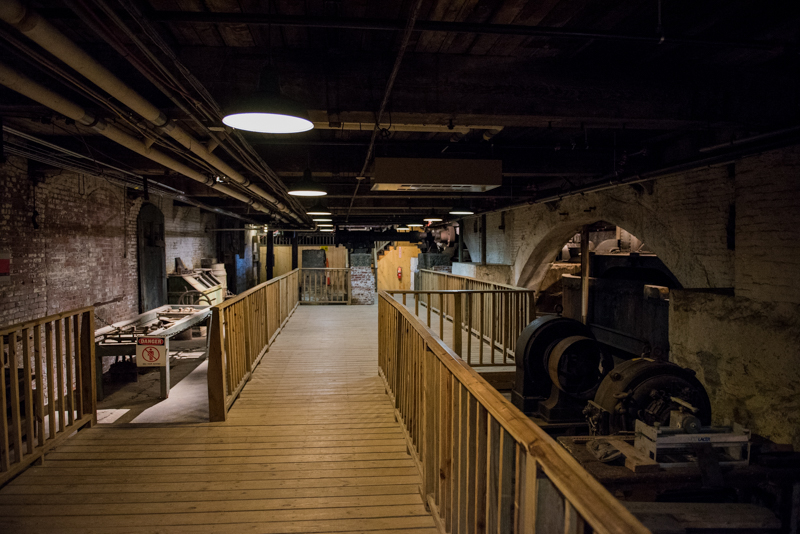
The turbine itself is in the “basement” along with other goodies. The basement is not very well lit, but the D750 performed quite well even at ISO 5000–8000.

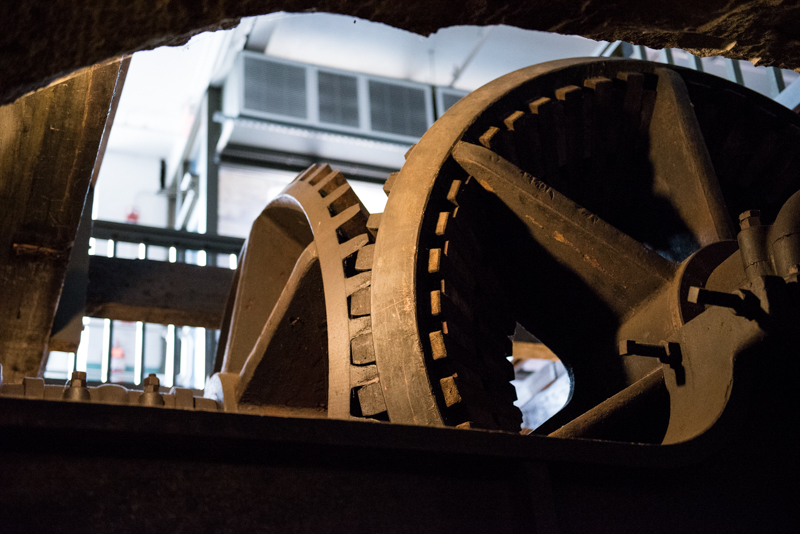
The turbine is geared to the flywheel.

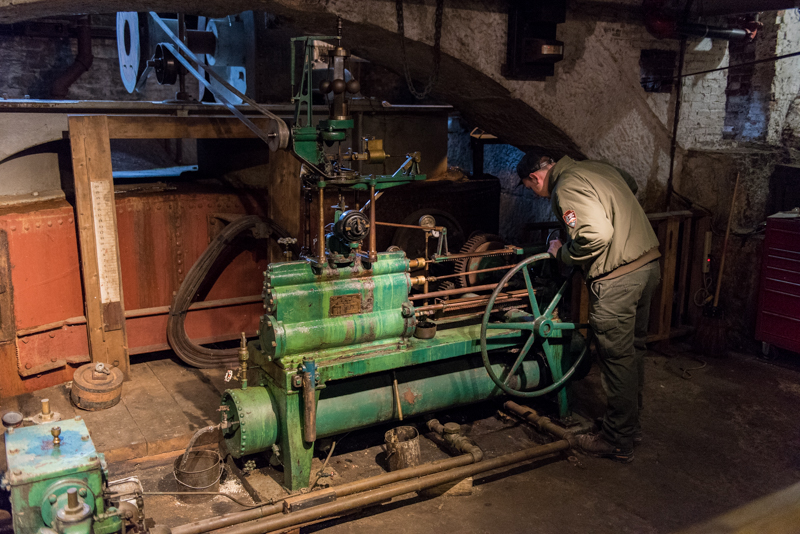
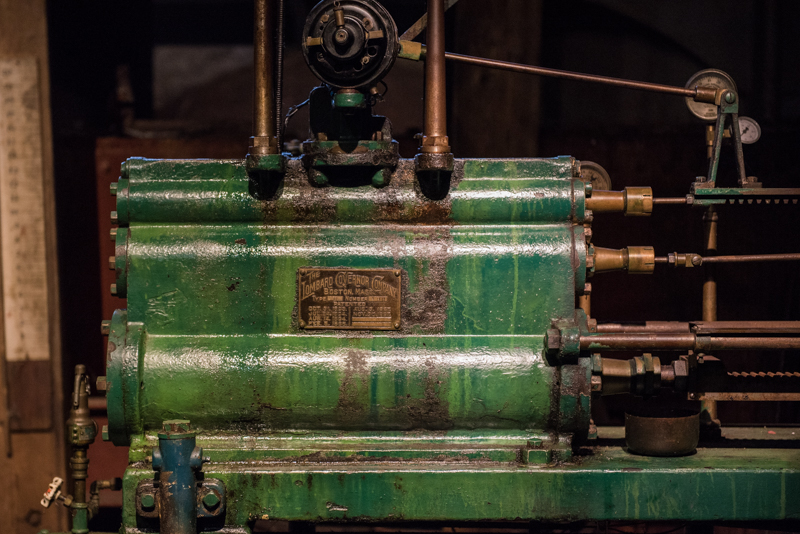
Finally, here is the turbine (inside the red-brown metal object in the background) and the governor (green machine in the foreground) controlling the amount of water entering the turbine and therefore the amount of energy getting stored in the flywheel.

The park service shows up in the mornings to “turn-on” the turbine.

A close-up of the governor:

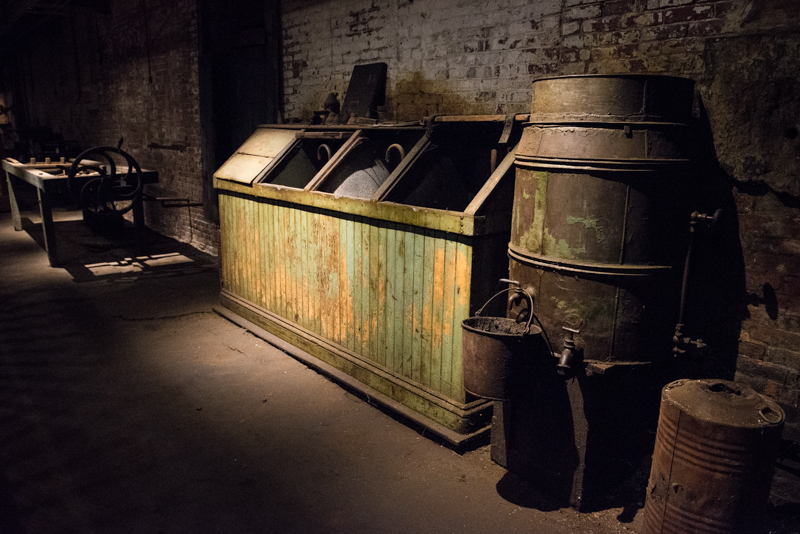
The table on the left was used for repairing of the 2 cm thick leather belts. I got the impression that the four section cabinet housed containers of oil used to lubricate various parts around the mill.

There are more than three times as many photos in the full gallery. Enjoy!

by JeffPC at June 03, 2016 10:13 PM

May 29, 2016

Josef "Jeff" Sipek

Trains

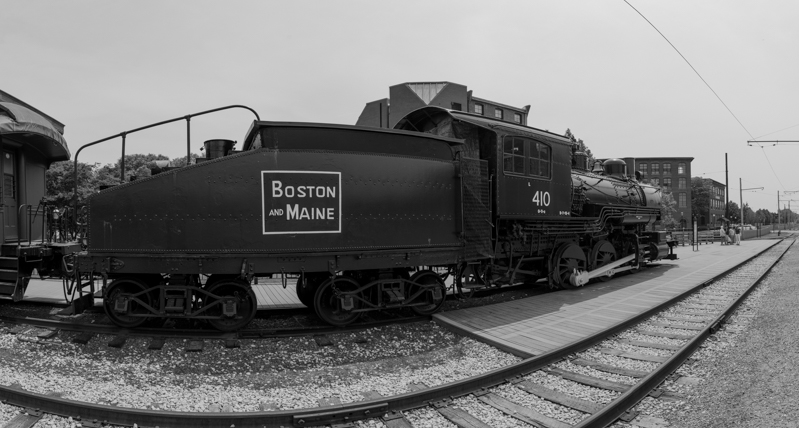
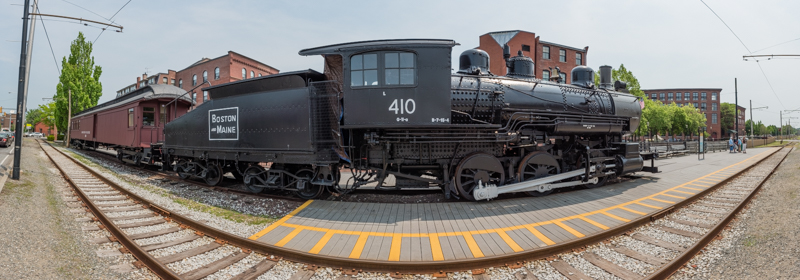
The other day I took a slightly longer lunch break and headed over to the National Streetcar Museum in Lowell, Massachusetts. Unfortunately, they were closed that day so instead I used the parked steam locomotive there as my photography subject. For more photos, check out the full gallery.

I took two panoramas. They are not perfect since I was hand holding the camera. The smaller one is made up of seven shots (15 MB full image for you pixel-peepers).

The larger panorama is made up of twelve images. (34 MB full image)

The D750 has a feature called live view—it lets me use the tilting screen on the back to compose my shot. This is very useful for otherwise awkward to compose shots. (Instead of having to crawl on the ground to see through the viewfinder, one can use the screen!) The very important thing to note about live view is that if you take a still image while in live view (by pressing the shutter all the way) the resulting image will have a 16:9 aspect ratio instead of the standard 3:2. To get a 3:2 image, one has to compose in live view, then turn off live view, and take the shot as always.

I am hoping to come back one day soon and see what the museum has to offer for my photography appetite.

by JeffPC at May 29, 2016 04:24 PM

May 27, 2016

Josef "Jeff" Sipek

Zoom in and Enhance!

Recently, I posted a gallery full of photos from Earth Day. While I was post-processing them, I noticed something interesting in one of the shots. Since it was interesting enough, I had to blahg about it. So, without further ado, let’s get started—in the style of terrible TV shows!

Display original image.

Zoom in. (Crop.)

Enhance. (Set shadows to +100.)

Enhance more. (Set black clipping to +100.)

Enhance even more. (Set exposure to +2EV.)

Zoom in more! (Resize 200% and then crop to original size.)

Ha! I knew it! There were people there! Mystery solved!

While I am being silly here, I think it’s actually very cool that so much detail got captured by the 24MP sensor on the D750 even at 70mm focal length while standing pretty far away.

Maybe in the near future, today’s groan-worthy “zoom in and enhance” TV scenes are going to be the reality we live in. Of course this brings up interesting concerns about privacy—is the camera pointing away from you actually focusing on a reflection of you? Alas I am not going to delve into this topic today.

by JeffPC at May 27, 2016 03:36 PM

May 23, 2016

Josef "Jeff" Sipek

Earth Day

For Earth Day, Holly and I went to the nearby Sherburne Nature Center for their Earth Day celebration. The three hour event included a walk through the woods there as well as a demonstration of some owls. We showed up a bit early, so we meandered in the woods for a bit on our own. I was armed with my D750 and the 24-70mm lens, and Holly sported the D70 with the 18-70mm kit lens at first but switched to the 70-300mm not too long after. While I did all the post-processing, some of the following photos are Holly’s. As always, there are more photos in the gallery.

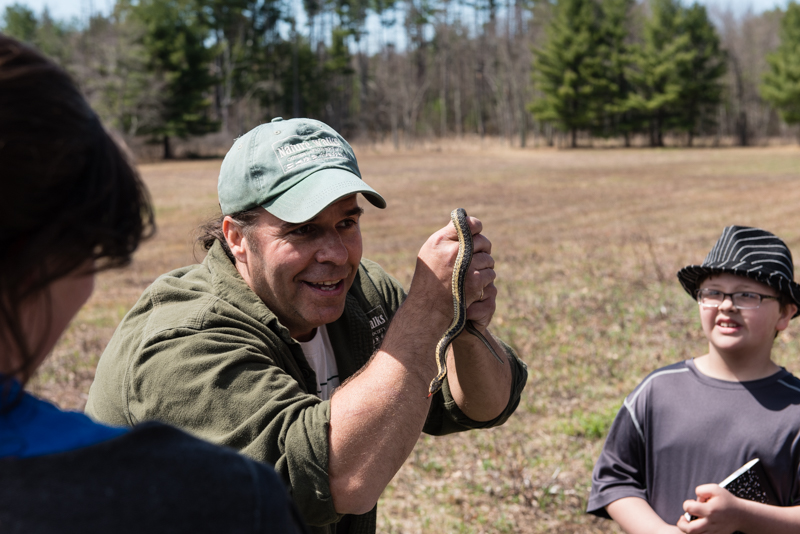
While meandering, we found a large-ish Wikipedia article: garter snake—I’m guessing it was about 1m long.

After about an hour of roaming around, we joined the narrated nature walk. The guide, Mark Fraser, was quite good at spotting assorted nature that I was totally unaware of. For example, he took all of 15 seconds to find this (much smaller) garter snake.

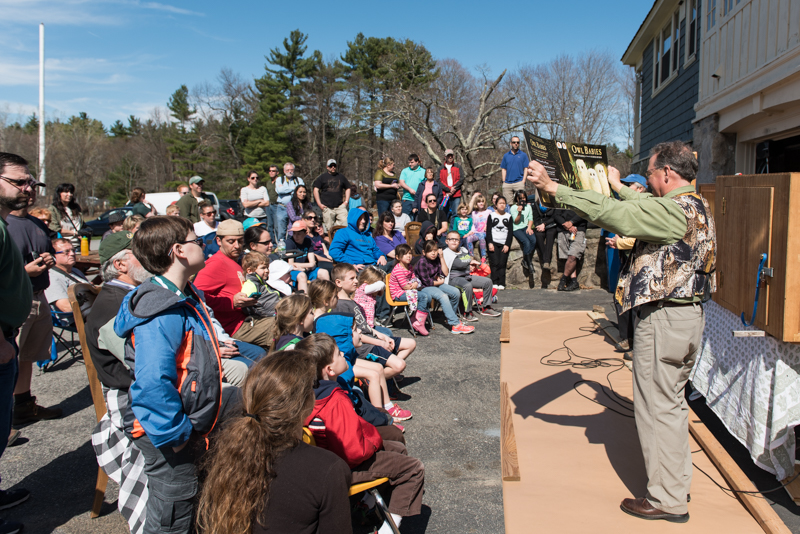
The nature walk was followed by the owl demonstration by Eyes on Owls. As you can see, the owl demonstration attracted a lot of kids.

After a brief intro to owls, six different owl types got shown. Of the six, I post-processed photos of four. (We got photos of the remaining two as well, but none of them struck me as interesting enough to post-process.) All of the owls they brought suffered from some sort of injury that made them unable to survive in the wild.

The screech owls:

Screech Owls

The barn owl:

Barn Owl

Barn Owl

The spectacled owl:

Spectacled Owl

Spectacled Owl

The snowy owl:

Snowy Owl

I wished I had a more telephoto lens than the 24-70mm, but thankfully the owl demonstration was pretty close to me—and the 24MP on the D750 let me crop quite a bit. At the same time, it is my understanding that for birding one wants the longest lens possible anyway. I’ve even heard that birders prefer DX camera bodies because of the crop factor. I think I understand them, but I’ll just stick to photographing mostly non-bird subjects and keep the FX sensor. I guess the world’s birds will have to be photographed by someone else. :)

by JeffPC at May 23, 2016 07:37 PM

May 22, 2016

Josef "Jeff" Sipek

Patriots' Day

I realize I’m a bit behind blahging about my photography adventures. Sorry. In early April, I ended up getting a walk-around lens I talked about previously—for reasons which I hope to discuss in another post, I ended up getting the Nikon 24-70mm f/2.8G. Needless to say, I’ve been using it quite a bit since.

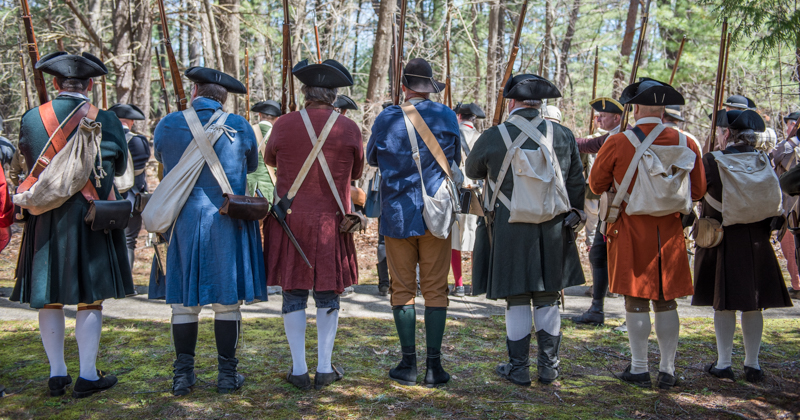
Not even two weeks after getting the 24-70mm, the nearby Minute Man National Historical Park had number of Patriots’ Day events. I had time, so armed with the D750 and the new 24-70mm I spent the Saturday running around taking photos. The day consisted of reenactments demonstrating what 1775 was like in Wikipedia article: Concord and Wikipedia article: Lexington, as well as what the Wikipedia article: running battle on April 19th, 1775 through them looked like.

The weather was good for watching, but not the best for photography—the bright sunlight created many harsh shadows. I tried to address them in Lightroom, but many are still way too obvious. Without further ado, here are a couple of photos from the event. As always, there are more photos in the full gallery.

The reenactor registration table—I’d like to think that something like this happened in 1775 when people signed up to fight the British.

There were about two hours where the reenactors mingled.

That eventually turned into practicing in formation and getting ready for the battle.

Then all the spectators moved toward the actual road where the battle would take place. Tons of additional spectators showed up out of nowhere. To amuse us (and to keep us on the correct side of the rope) some of the volunteers provided light entertainment. For example, one was dressed as a British officer on a horse and mocked (1775-style) the crowd’s ignorance of how benevolent the British are.

Others entertained the somewhat restless kids in the crowd.

Around this time, I realized that 70mm wouldn’t be enough. Not having brought any other lenses with me, I had to make the best of it. This resulted in a copious amount of cropping in Lightroom. (Obviously, I need to get the 70-200mm f/2.8 for next time ;) )

Anyway, both the British and the revolutionaries came and went. Not having anything else to photograph in front of me, I decided to follow the reenactors down the road. Sadly, that meant not having front row access and having to shoot over people’s shoulders.

All in all, I took about 600 shots that day. The 24-70mm performed admirably. Yes, I wish I had a more telephoto lens as well, but that’s not a fault of the 24-70mm. Finally, I was pleasantly surprised that the 1650g combo (750g for the camera, 900g for the lens) did not end up feeling too heavy. It certainly was not light, but I did not feel like I had an albatross around my neck.

by JeffPC at May 22, 2016 11:13 PM

May 01, 2016

Josef "Jeff" Sipek

setuid/setgid & coreadm

While core files can be a huge nuisance (i.e., “why are there core files all over my file system?!”), it is hard to deny the fact that they often are invaluable when trying to diagnose a bug. Illumos systems allow the system administrator to control the creation of core files in an easy but powerful way—via the coreadm utility. Recently, I had a bit of a run-in with coreadm because I misunderstood one of its features. As I often do, I’m using this space to document my findings for my and others’ benefit.

A Small Introduction

First of all, let me introduce coreadm a little bit. Simply running coreadm without any arguments will print the current settings. For example, these are the default Illumos settings (keep in mind that some distros use different defaults):

# coreadm
     global core file pattern: 
     global core file content: default
       init core file pattern: core
       init core file content: default
            global core dumps: disabled
       per-process core dumps: enabled
      global setid core dumps: disabled
 per-process setid core dumps: disabled
     global core dump logging: disabled

When I first came across coreadm a couple of years ago, I expected a boolean (“should cores be created”) and a pattern for core file names. As you can see above, there are more options than that. While wearing both developer and system administrator hats at the same time, I was very happy to see that it is possible for a misbehaving process to create two cores—a “per-process” core and a “global” one. Since most are familiar with the “per-process” cores that end up in whatever the current working directory was, I’m going to talk only about the global ones. (The term “global” in this context has nothing to do with the global zone. All these settings are per zone.)

The global core settings allow the system administrator to save a copy of every core ever made in a central location for later analysis. So, for example we can make all normal as well as setuid processes dump core in a specified location (e.g., /cores/%f.%p):

# coreadm -e global -e global-setid -g /cores/%f.%p

Running coreadm without any arguments again shows us the new configuration:

# coreadm 
     global core file pattern: /cores/%f.%p
     global core file content: default
       init core file pattern: core
       init core file content: default
            global core dumps: enabled
       per-process core dumps: enabled
      global setid core dumps: enabled
 per-process setid core dumps: disabled
     global core dump logging: disabled

setid

The difference between plain ol’ global core dumps and global setid core dumps is pretty easy to guess: global core dumps are exactly what I described above…except a setid process will not generate a core file unless the setid core dumps are also enabled. The handwavy reasoning here is that setid cores can include sensitive information that could be leaked by sharing the core.

The aspect that bit me recently is that if a process gives up its privileges via setuid(2), it is treated the same way as if it were setuid. This behavior is documented in the setuid syscall handler in uid.c:121:

	/*
	 * A privileged process that gives up its privilege
	 * must be marked to produce no core dump.
	 */

So, when I tried to make the daemon more secure by instructing it to change to a non-privileged user, I was accidentally disabling core dumps for that process. Needless to say, this made debugging the SIGSEGV I was running into significantly harder. Now that I know this, I make sure both global and global setid cores are always enabled.

by JeffPC at May 01, 2016 01:46 PM

2016-05-01

The resolution of the Bitcoin experiment

Needs washed — A (strange) regional syntactic construct.

The Inside Story of an Aid Worker’s Secret Weapon: The Tarp

3L: The Operating System for the Future — An OS written in Scheme.

Dear Headhunters… — Joerg Moellenkamp’s rant directed at headhunters.

Princeton University Computer Architecture — Computer architecture course from Princeton offered through Coursera.

Glendix — Plan 9 userspace on top of the Linux kernel.

awk-raycaster — Pseudo-3D shooter written completely in awk using raycasting.

by JeffPC at May 01, 2016 01:45 PM

March 28, 2016

Josef "Jeff" Sipek

Manual Exposure Thoughts

As I mentioned in my previous post, I recently bought a Nikon D750. There is one big thing I did not anticipate happening—I have been shooting mostly in manual mode. (On the D70, I was almost always in aperture-priority mode.)

Using manual mode makes me think about the exposure which leads to thinking about the other stuff—composition, DOF, etc. I am not going to say that my shots are spectacular as a result, but I certainly think that they are better thought out. I do not know how long it will be before I decide that it is a terrible idea and I revert to aperture-priority. :)

I always thought that manual mode was too slow to set up for capture-the-moment type photography. It turns out that in general, it is not slower than semi-automatic modes like aperture-priority.

The secret here is that one can get close to the correct exposure way before the decisive moment. For example, while walking around on a sunny day, one can meter the surroundings and select a good ISO, shutter speed, and aperture. Then, when something interesting is happening, it is a matter of tweaking the exposure—by changing the aperture or shutter speed a little bit. This is something one has to do anyway in the semi-automatic modes. Of course as one continues walking around one needs to notice the light changing and adjust the approximate exposure.

Worst case, the exposure is off a little bit. Shooting raw however means that even if it is off by 2EV, the shot is not lost. This is very similar to how things were back in 35mm film days.

While it sounds like extra work, it really is not. Even if one is in a semi-automatic mode, one needs to have a reasonable exposure setting to begin with. On my D70 in aperture-priority mode, I have missed a number of shots over the years simply because I was at f/22 and it takes forever to scroll through 5EVs worth of aperture settings in 1/3 EV increments, or worse yet my ISO was set either too low or too high. Had I paid attention to available light and pre-adjusted the exposure in anticipation of taking a shot, I would have lost fewer shots.

With that said, semi-auto modes make a ton of sense in certain situations, but I am sticking with manual-mode for now.

by JeffPC at March 28, 2016 02:23 AM

D750 Samples

I realize that I did not include any sample images in my mini-review of Nikon D750. That is what this post is about.

Here is a handful of photos from a gallery of D750 samples I uploaded for your viewing pleasure. Some of these are not great images, but instead they are meant to illustrate the capabilities of the of the camera. All of the photos below were taken using the Nikon AF Nikkor 50mm f/1.8D.

One evening, I decided to try out the high-ISO performance. The following is a hand-held shot of 1/200 seconds at f/4 with ISO 8000. While there is definitely noise, the image is far from unusable.

This is only about a third of the photos in the gallery, so do not forget to check it out.

by JeffPC at March 28, 2016 02:23 AM

Photo Gear Upgrade

It is 2016 and the digital SLR landscape is very different from what it was back in December 2004 when I bought my trusty Nikon D70. While the D70 is still going strong, it is obvious that DSLRs have dramatically improved in quality and upgrading would let me play with light in ways that the D70 just cannot handle. So after about a year and a half of telling others that I should upgrade my camera, I somehow managed to convince myself that I should actually upgrade instead of just talking about it.

The Body

Since so much has changed over the past 11 years, I had to essentially survey the land from scratch. I even glanced at the Canon lineup, but ended up focusing only on Nikons simply because I like how Nikon SLRs feel in my hand as well as the layout of the controls. (Already having a Nikon F-mount 50mm f/1.8 helped a little as well.)

Nikon has a decent lineup of cameras and choosing one is not the easiest of tasks. One of the more interesting questions I had to answer was: do I want a full-frame (FX) or a crop-sensor (DX) camera? Having “suffered” with the DX D70 for 11 years and envying all the people with full-frame DSLRs, I decided to bite the bullet and pay for the privilege of having a full-frame sensor. This narrowed the field down to D610, D750, and D810. The D810 was simply out of my price range ($2800). Between the D610 and the D750, the D750 wins at everything (technical specs, as well as the feel in hand) except the price—the D610 currently sells for $1300 while the D750 is $2000.

After about a week of deliberating and reading everything I could about the D610 and the D750, I decided to go with the D750.

The Lens

An SLR camera is useless without a lens. My arsenal of lenses has only one that is full-frame friendly and worth putting on a D750—the AF Nikkor 50mm f/1.8.

My D70 came with a 18–70mm kit lens (which behaves as 27–105mm due to the crop factor), and I think this is a good range for a general walk-around lens. So based on this, I am thinking that I want something similar. Now, there are a number of options. I spent a good week trying to figure out what I should do lens-wise before I even bought the camera.

First of all, there is a D750 kit. It comes with the Nikon AF-S Nikkor 24-120mm f/4 ED VR lens. By itself the lens costs about $1100, but the kit is only $300 more than the body alone. So, one could get that and if one does not like it one should be able to sell it for about $300–$400. Financially it makes sense.

So, I had a choice whether I should only get the body or if I should get the kit and either keep the lens or sell it and use the proceeds toward a lens I really wanted. If I got the body by itself, I would have my trusty 50mm prime to play with until I got a new lens.

Here are some lenses I found. I have only had a chance to play with one—the D750 kit lens.

Nikon AF-S Nikkor 24-120mm f/4 ED VR (kit, +$300)
I got to play with this lens on a D750 and I had a couple of observations. While the room I was playing in was relatively decently lit (it certainly is not dark), I had some serious problems with exposure trying to keep the ISO below 1000 and the shutter speed within hand-holding range. Even at f/4. This is not surprising, since I know that I would have the same kind of problem with my 18–70mm f/3.5-4.5 zoom. I bet this would be a great lens outside. There is definitely some distortion. Near the edges there is noticeable barrel/pincushion distortion which makes straight lines look obviously “bent”. There is also some vignetting. In a “creative” shot of the dull carpeting on the floor, I saw that the corners were noticeably darker than the center. Lightroom fixed it up in no time.
Sigma 24-105mm f/4 DG OS HSM A ($900)
People seem to be raving about Sigma’s Art (“A”) lenses. Based on the sample images I have seen this is a good lens. The f/4 however is not very exciting at all. Much like the D750 kit lens, it is just too slow for anything other than daytime outdoors photography. In theory the vibration reduction (“OS” in Sigma’s lingo) should help with that, but I am not sold on VR as the solution to low light.
Sigma 24-70mm f/2.8 IF EX DG HSM ($750)
A bit shorter than the 24-105mm Sigma Art lens, but it makes up for it (in my opinion) with a fast f/2.8 aperture. It also loses the VR but I would rather fast aperture than VR.
Nikon AF-S Nikkor 24-70mm f/2.8G ED ($1700, $2300 for f/2.8E)
This is a very nice lens. The only negative thing I have ever heard about it is that it is way too expensive. Indeed, $1700 is way too much for a hobbyist to spend on a single lens. Recently-ish, Nikon made a new version of this lens (the f/2.8E) which features VR as well. Sadly, this new version is even more expensive.
Tamron SP 24-70mm f/2.8 DI VC USD ($1100)
Price-wise, this one is between the Sigma 24-70mm and Nikon 24-70mm f/2.8G. I hear good things about the image quality, but I have not spend enough time looking at it…yet.

It is rather unfortunate that good fast lenses are so expensive.

After a week of going back and forth on whether I should get the kit or not, I decided that I was going to take the easy way out, and get it. Amusingly enough, the evening I decided to place my order, B&H updated the product page with a banner saying that the combo has been discontinued by the manufacturer. Since I was so torn about the kit lens to begin with, I just shrugged and bought the body only. (The next day, the kit was available again.)

B&H threw in a 32GB SD card and a 4TB USB3 external hard drive—both useful. This way, I did not have to try to figure out which SD card I should get and I have an external hard drive to backup my photos to!

The shipping was prompt and uneventful.

“Review”

Keep in mind that I did not yet buy one of the zooms I talked about earlier.

So far, I spent most of my time running around with a 50mm f/1.8 prime (which is finally usable thanks to the FX sensor). The image quality is great regardless of how much light is present. I have used it indoors, for a white background “product shot”, as well as outdoors (under clear skies with tons of harsh sunlight and shadows, during a sunset, by a fog-covered pond on a rainy day, by a poorly lit church at night, …) and I am constantly blown away at how much detail can be extracted from the shadows. Even at night with ISO 8000 the performance is amazing—autofocus very rarely hunts and the noise is manageable.

There is one thing I miss that my D70 had—the 1/8000 shutter. The D750’s 1/4000 is still quite good, but on a bright day it would be convenient to have the option to have a shorter exposure than 1/4000 instead of having to reach for ND filters (which I do not have) or venture into extended ISO to cut down on the amount of light.

The body is rather hefty (750g), but since the 50mm f/1.8 is so light (156g) it does not bother me at all. The weight seems well distributed, and gives the camera a feel of quality—not just a body with a ballast. I may start minding the weight a bit once I get an FX standard zoom which will be a whole lot heavier than the 50mm prime I have now (e.g., 790g for the Sigma 24–70 f/2.8).

There are 51 autofocus points. 51! This is an insane number compared to the 5 that are on the D70. Sadly, as most D750 reviews point out, all 51 AF points are clustered in the center of the frame. As a result, it is possible that one may have to use a nearby AF point and recompose. It is a bit annoying, but it is nowhere near as bad as what I had to deal with on the D70 where a very large number of shots required a bit of recomposing. (Yes, I realize this is a crummy comparison.) Of the several hundred shots I took on the D750, I think I had to recompose maybe 1% of the time. I expect that to be an exaggeration too since I have been trying various extreme scenes to see how the camera reacts so the in-focus portion is not always near the AF points.

Software

Almost four years ago, I blahged about how Adobe Lightroom 4 makes it easy to manage and edit photos. I have been happily using Lightroom ever since.

Needless to say, I was disappointed that I could not import the D750 raw files (NEF) into Lightroom 4. It has been a while since Adobe updated Lightroom 4’s camera database and I don’t blame them. Thankfully, Adobe has a free DNG converter program which can batch convert NEFs to DNGs. Lightroom 4 then happily imports the generated DNGs.

I did this pre-import conversion for about a week. Then I found out that I can get the Lightroom 6 upgrade for $79 and that there is no need to do this import dance. Not only that, but Lightroom 6 has a number of goodies that are not in Lightroom 4. For example, built-in panorama and HDR merging, and facial recognition. I bought the upgrade, installed it, and started importing NEFs directly without any problems.

The raw files that come out of the camera are huge (~30MB) compared to what I was used to on my D70 (~4.5MB). As a result, disk space fills up quickly, and transferring them between computers takes longer. It is a small price to pay for the amount of detail captured by the camera.

Related Posts

There are two other posts to go along with this one. In the first, I include some sample photos taken with the D750. In the second, I describe my latest thoughts about manual exposure mode.

by JeffPC at March 28, 2016 02:22 AM

February 24, 2016

Josef "Jeff" Sipek

OpenIndiana: UFS Root and FreeBSD Loader

Recently, I had a couple of uses for an illumos-based system that does not use ZFS for the root file system. The first time around, I was trying to test a ZFS code change and it is significantly easier to do when the root file system is not the same as the file system likely broken by my changes. The second time around, I did not want to deal with the ARC eating up all the RAM on the test system.

It is still possible to use UFS for the root file system, it just requires a bit of manual labor as illumos distros do not let you install directly to a UFS volume these days. I am using this post to write down the steps necessary to get a VM with UFS root file system up and running.

Virtual Hardware

First of all, let’s talk about the virtual hardware necessary. We will need a NIC that we can dedicate to the VM so it can reach the internet. Second, we will need two disks. Here, I am using a VNIC and two zvols to accomplish this. Finally, we will need an ISO with OpenIndiana Hipster. I am using the ISO from October 2015.

Let’s create all the virtual hardware:

host# dladm create-vnic -l e1000g0 ufsroot0
host# zfs create storage/kvm/ufsroot
host# zfs create -V 10g -s storage/kvm/ufsroot/root 
host# zfs create -V 10g -s storage/kvm/ufsroot/swap

The overall process will involve borrowing the swap disk to install Hipster on it normally (with ZFS as the root file system), and then we will copy everything over to the other disk where we will use UFS. Once we are up and running from the UFS disk, we will nuke the borrowed disk contents and set it up as a swap device. So, let’s fire up the VM. To make it easier to distinguish between the two disks, I am setting up the root disk as a virtio device while the other as an IDE device. (We will change the swap device to be a virtio device once we are ready to reclaim it for swap.)

host# /usr/bin/qemu-kvm \
	-enable-kvm \
	-vnc 0.0.0.0:42 \
	-m 2048 \
	-no-hpet \
	-drive file=/dev/zvol/rdsk/storage/kvm/ufsroot/root,if=virtio,index=0 \
	-drive file=/dev/zvol/rdsk/storage/kvm/ufsroot/swap,if=ide,index=1 \
	-net nic,vlan=0,name=net0,model=virtio,macaddr=2:8:20:a:46:54 \
	-net vnic,vlan=0,name=net0,ifname=ufsroot0,macaddr=2:8:20:a:46:54 \
	-cdrom OI-hipster-text-20151003.iso -boot once=d \
	-smp 2 \
	-vga std \
	-serial stdio

Installing

I am not going to go step by step through the installation. All I am going to say is that you should install it on the IDE disk. For me it shows up as c0d1. (c2t0d0 is the virtio disk.)

Once the system is installed, boot it. (From this point on, we do not need the ISO, so you can remove the -cdrom from the command line.) After Hipster boots, configure networking and ssh.

Updating

Now that we have a very boring stock Hipster install, we should at the very least update it to the latest packages (via pkg update). I am updating to “jeffix” which includes a number of goodies like Toomas Soome’s port of the FreeBSD loader to illumos. If you are using stock Hipster, you will have to figure out how to convince GRUB to do the right thing on your own.

ufsroot# pkg set-publisher --non-sticky openindiana.org
ufsroot# pkg set-publisher -P -g http://pkg.31bits.net/jeffix/2015/ \
	jeffix.31bits.net
ufsroot# pkg update
            Packages to remove:  31
           Packages to install:  14
            Packages to update: 518
           Mediators to change:   1
       Create boot environment: Yes
Create backup boot environment:  No

DOWNLOAD                                PKGS         FILES    XFER (MB)   SPEED
Completed                            563/563     8785/8785  239.7/239.7  1.3M/s

PHASE                                          ITEMS
Removing old actions                       7292/7292
Installing new actions                     5384/5384
Updating modified actions                10976/10976
Updating package state database                 Done 
Updating package cache                       549/549 
Updating image state                            Done 
Creating fast lookup database                   Done 

A clone of openindiana exists and has been updated and activated.
On the next boot the Boot Environment openindiana-1 will be
mounted on '/'.  Reboot when ready to switch to this updated BE.


---------------------------------------------------------------------------
NOTE: Please review release notes posted at:

http://wiki.openindiana.org/display/oi/oi_hipster
---------------------------------------------------------------------------

Reboot into the new boot environment and double check that the update really updated everything it was supposed to.

ufsroot# uname -a
SunOS ufsroot 5.11 jeffix-20160219T162922Z i86pc i386 i86pc Solaris

Great!

Partitioning

First, we need to partition the virtio disk. Let’s be fancy and use a GPT partition table. The easiest way to create one is to create a whole-disk zfs pool on the virtio disk and immediately destroy it.

ufsroot# zpool create temp-pool c2t0d0
ufsroot# zpool destroy temp-pool

This creates an (almost) empty GPT partition table. We need to add two partitions—one tiny partition for the boot block and one for the UFS file system.

ufsroot# format
Searching for disks...done


AVAILABLE DISK SELECTIONS:
       0. c0d1 <QEMU HARDDISK=QM00002-QM00002-0001-10.00GB>
          /pci@0,0/pci-ide@1,1/ide@0/cmdk@1,0
       1. c2t0d0 <Virtio-Block Device-0000-10.00GB>
          /pci@0,0/pci1af4,2@4/blkdev@0,0
Specify disk (enter its number): 1
selecting c2t0d0
No defect list found
[disk formatted, no defect list found]
...
format> partition

I like to align partitions to 1MB boundaries, that is why I specified 2048 as the starting sector. 1MB is plenty of space for the boot block, and it automatically makes the next partition 1MB aligned. It is important to specify “boot” for the partition id tag. Without it, we will end up getting an error when we try to install the loader’s boot block.

partition> 0
Part      Tag    Flag     First Sector        Size        Last Sector
  0        usr    wm               256       9.99GB         20955102    

Enter partition id tag[usr]: boot
Enter partition permission flags[wm]: 
Enter new starting Sector[256]: 2048
Enter partition size[20954847b, 20956894e, 10231mb, 9gb, 0tb]: 1m

Since I am planning on using a separate disk for swap, I am using the rest of this disk for the root partition.

partition> 1
Part      Tag    Flag     First Sector        Size        Last Sector
  1 unassigned    wm                 0          0              0    

Enter partition id tag[usr]: root
Enter partition permission flags[wm]: 
Enter new starting Sector[4096]: 
Enter partition size[0b, 4095e, 0mb, 0gb, 0tb]: 20955102e
partition> print
Current partition table (unnamed):
Total disk sectors available: 20955069 + 16384 (reserved sectors)

Part      Tag    Flag     First Sector        Size        Last Sector
  0       boot    wm              2048       1.00MB         4095    
  1       root    wm              4096       9.99GB         20955102    
  2 unassigned    wm                 0          0              0    
  3 unassigned    wm                 0          0              0    
  4 unassigned    wm                 0          0              0    
  5 unassigned    wm                 0          0              0    
  6 unassigned    wm                 0          0              0    
  8   reserved    wm          20955103       8.00MB         20971486    

When done, do not forget to run the label command:

partition> label
Ready to label disk, continue? yes

Format and Copy

Now that we have the partitions all set up, we can start using them.

ufsroot# newfs /dev/rdsk/c2t0d0s1
newfs: construct a new file system /dev/rdsk/c2t0d0s1: (y/n)? y
Warning: 34 sector(s) in last cylinder unallocated
/dev/rdsk/c2t0d0s1:     20951006 sectors in 3410 cylinders of 48 tracks, 128 sectors
        10230.0MB in 214 cyl groups (16 c/g, 48.00MB/g, 5824 i/g)
super-block backups (for fsck -F ufs -o b=#) at:
 32, 98464, 196896, 295328, 393760, 492192, 590624, 689056, 787488, 885920,
 20055584, 20154016, 20252448, 20350880, 20449312, 20547744, 20646176,
 20744608, 20843040, 20941472
ufsroot# mkdir /a
ufsroot# mount /dev/dsk/c2t0d0s1 /a

To get a consistent snapshot of the current (ZFS) root, I just make a new boot environment. I could take a recursive ZFS snapshot manually, but why do that if beadm can do it for me automatically? (The warning about missing menu.lst is a consequence of me using jeffix which includes the FreeBSD loader. It can be safely ignored.)

ufsroot# beadm create tmp
WARNING: menu.lst file /rpool/boot/menu.lst does not exist,
         generating a new menu.lst file
Created successfully
ufsroot# beadm mount tmp
Mounted successfully on: '/tmp/tmp._haOBb'

Now, we need to copy everything to the UFS file system. I use rsync but all that matters is that the program you use will preserve permissions and can cope with all the file types found on the root file system.

In addition to copying the mounted boot environment, we want to copy /export. (Recall that /export is outside of the boot environment, and therefore it will not appear under the temporary mount.)

ufsroot# rsync -a /tmp/tmp._haOBb/ /a/
ufsroot# rsync -a /export/ /a/export/

At this point, we are done with the temporary boot environment. Let’s at least unmount it. We could destroy it too, but it does not matter since we will eventually throw away the entire ZFS root disk anyway.

ufsroot# beadm umount tmp

Configuration Tweaks

Before we can use our shiny new UFS root file system to boot the system, we need to do a couple of cleanups.

First, we need to nuke the ZFS zpool.cache:

ufsroot# rm /a/etc/zfs/zpool.cache 

Second, we need to modify vfstab to indicate the root file system and comment out the zvol based swap device.

ufsroot# vim /a/etc/vfstab

So, we add this line:

/dev/dsk/c2t0d0s1       -       /               ufs     -       yes     -

and either remove or comment out this line:

#/dev/zvol/dsk/rpool/swap       -               -               swap    -       no      -

Third, we need to update boot properties file (bootenv.rc) to tell the kernel where to find the root file system (i.e., the boot path) and the type of the root file system. To find the boot path, I like to use good ol’ ls:

ufsroot# ls -lh /dev/dsk/c2t0d0s1
lrwxrwxrwx 1 root root 46 Feb 21 17:43 /dev/dsk/c2t0d0s1 -> ../../devices/pci@0,0/pci1af4,2@4/blkdev@0,0:b

The symlink target is the boot path—well, you need to strip the fluff at the beginning.

So, we need to add these two lines to /a/boot/solaris/bootenv.rc:

setprop fstype 'ufs'
setprop bootpath '/pci@0,0/pci1af4,2@4/blkdev@0,0:b'

Ok! Everything is configured properly; we have to rebuild the boot archive. This should result in /a/platform/i86pc/boot_archive getting updated and a /a/platform/i86pc/boot_archive.hash getting created.

ufsroot# bootadm update-archive -R /a
ufsroot# ls -lh /a/platform/i86pc/
total 33M
drwxr-xr-x  4 root sys  512 Feb 21 18:38 amd64
drwxr-xr-x  6 root root 512 Feb 21 17:44 archive_cache
-rw-r--r--  1 root root 33M Feb 21 18:37 boot_archive
-rw-r--r--  1 root root  41 Feb 21 18:37 boot_archive.hash
drwxr-xr-x 10 root sys  512 Feb 21 18:00 kernel
-rwxr-xr-x  1 root sys  44K Feb 21 18:00 multiboot
drwxr-xr-x  4 root sys  512 Feb 21 17:44 ucode
drwxr-xr-x  2 root root 512 Feb 21 18:04 updates

Installing Boot Blocks

We have one step left! We need to install the boot block to the boot partition on the new disk. That one simple-ish command. Note that the device we are giving is the UFS partition device. Further note that the installboot finds the boot partition automatically based on the “boot” partition id tag.

ufsroot# installboot -m /a/boot/pmbr /a/boot/gptzfsboot /dev/rdsk/c2t0d0s1
Updating master boot sector destroys existing boot managers (if any).
continue (y/n)? y
bootblock written for /dev/rdsk/c2t0d0s0, 214 sectors starting at 1 (abs 2049)
stage1 written to slice 0 sector 0 (abs 2048)
stage1 written to slice 1 sector 0 (abs 4096)
stage1 written to master boot sector

If you are using GRUB instead, you will want to install GRUB on the disk…somehow.

Booting from UFS

Now we can shut down, change the swap disk’s type to virtio and boot back up.

host# /usr/bin/qemu-kvm \
	-enable-kvm \
	-vnc 0.0.0.0:42 \
	-m 2048 \
	-no-hpet \
	-drive file=/dev/zvol/rdsk/storage/kvm/ufsroot/root,if=virtio,index=0 \
	-drive file=/dev/zvol/rdsk/storage/kvm/ufsroot/swap,if=virtio,index=1 \
	-net nic,vlan=0,name=net0,model=virtio,macaddr=2:8:20:a:46:54 \
	-net vnic,vlan=0,name=net0,ifname=ufsroot0,macaddr=2:8:20:a:46:54 \
	-smp 2 \
	-vga std \
	-serial stdio

Once the VM comes back up, we can add a swap device. The swap disk shows up for me as c3t0d0.

ufsroot# swap -a /dev/dsk/c3t0d0p0
operating system crash dump was previously disabled --
invoking dumpadm(1M) -d swap to select new dump device

We also need to add the description of the swap device to /etc/vfstab. So, fire up vim and add the following line:

/dev/dsk/c3t0d0p0       -       -               swap    -       no      -

That’s it! Now you can bask in the glory that is UFS root!

ufsroot$ df -h
Filesystem         Size  Used Avail Use% Mounted on
/dev/dsk/c2t0d0s1  9.9G  2.9G  6.9G  30% /
swap               1.5G 1016K  1.5G   1% /etc/svc/volatile
swap               1.5G  4.0K  1.5G   1% /tmp
swap               1.5G   52K  1.5G   1% /var/run
ufsroot$ zfs list
no datasets available

Caveat

Unfortunately, pkg assumes that the root file system is ZFS. So, updating certain packages (anything that would normally create a new boot environment) will likely fail.

by JeffPC at February 24, 2016 10:57 PM

January 14, 2016

Josef "Jeff" Sipek

2016-01-14

Radium-Schokolade (1925) — Radium-laced Chocolate. Sold as something to rejuvenate your organs by eating or drinking it.
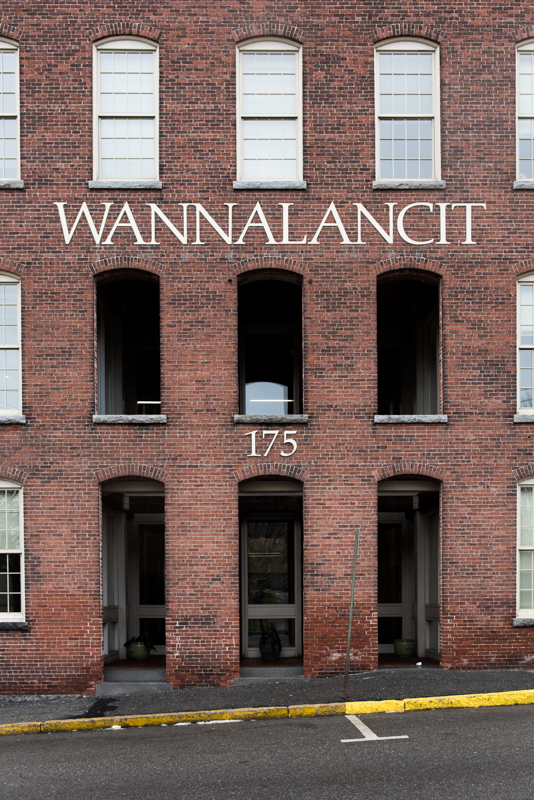
Untraceable communication — guaranteed — New untraceable text-messaging system comes with statistical guarantees.

Normalization of Deviance in Software

Michigan Terminal System Archive — It is good to see Wikipedia article: MTS live on as a historical curiosity and hobbyist OS.

Researchers uncover JavaScript-based ransomware-as-service — Ransomware-as-a-service…sigh.

imap4 partial fetch request — Sadly, mutt still doesn’t have it. I really don’t enjoy waiting for a large attachment to get downloaded over a slow link just because I want to read the email body.

Mathematicians invent new way to slice pizza into exotic shapes — I am not sure how some of those new shapes can possibly work in the real life without the notches essentially splitting the slice into a pile of mush that cannot be held.

by JeffPC at January 14, 2016 06:49 PM

December 31, 2015

Nate Berry

Ian Murdock, founder of Debian, dead at 42 under strange circumstances

Mr. Murdock, the founder of Debian, had apparently suddenly begun posting some very strange things on Twitter over the weekend suggesting that he was planning suicide but also alleging police abuse. The posts seemed uncharacteristic of him, and many folks speculated that his account had been hacked.

by Nate at December 31, 2015 06:21 PM

December 26, 2015

Josef "Jeff" Sipek

November 29, 2015

Josef "Jeff" Sipek

MACHINE_THAT_GOES_PING

Given that my first UNIX experience was on Linux, I’ve gotten used to the way certain commands work. When I switched from Linux to OpenIndiana (an Illumos-based distro), I had to get used to the fact that some commands worked slightly (or in some case extremely) differently. One such command is ping.

On Linux, invoking ping without any arguments, I would get the very familiar output:

linux$ ping powerdns.com
PING powerdns.com (82.94.213.34) 56(84) bytes of data.
64 bytes from xs.powerdns.com (82.94.213.34): icmp_req=1 ttl=55 time=98.0 ms
64 bytes from xs.powerdns.com (82.94.213.34): icmp_req=2 ttl=55 time=99.2 ms
64 bytes from xs.powerdns.com (82.94.213.34): icmp_req=3 ttl=55 time=100 ms
^C
--- powerdns.com ping statistics ---
3 packets transmitted, 3 received, 0% packet loss, time 2002ms
rtt min/avg/max/mdev = 98.044/99.170/100.188/0.950 ms

I was very surprised when I first ran ping on an OpenIndiana box since it outputted something very different:

oi$ ping powerdns.com
powerdns.com is alive

No statistics! Just a boolean indicating “has the host responded to a single ping.” When I run ping, I want to see the statistics—that’s why I run ping to begin with. The manpage helpfully points out that I can get statistics by using the -s option:

oi$ ping -s powerdns.com
PING powerdns.com: 56 data bytes
64 bytes from xs.powerdns.com (82.94.213.34): icmp_seq=0. time=98.955 ms
64 bytes from xs.powerdns.com (82.94.213.34): icmp_seq=1. time=99.597 ms
64 bytes from xs.powerdns.com (82.94.213.34): icmp_seq=2. time=99.546 ms
^C
----powerdns.com PING Statistics----
3 packets transmitted, 3 packets received, 0% packet loss
round-trip (ms)  min/avg/max/stddev = 98.955/99.366/99.597/0.357

For the past few years, I’ve just been getting used to adding -s. It was a little annoying, but it wasn’t the end of the world because I don’t use ping that much and when I do, the two extra characters don’t matter.

Recently, I was looking through the source for Illumos’s ping when I discovered that statistics can be enabled not just by the -s option but also with the MACHINE_THAT_GOES_PING environment variable!

A quick test later, I added the variable to my environment scripts and never looked back.

This is what is looks like:

oi$ export MACHINE_THAT_GOES_PING=1
oi$ ping powerdns.com
PING powerdns.com: 56 data bytes
64 bytes from xs.powerdns.com (82.94.213.34): icmp_seq=0. time=98.704 ms
64 bytes from xs.powerdns.com (82.94.213.34): icmp_seq=1. time=99.062 ms
64 bytes from xs.powerdns.com (82.94.213.34): icmp_seq=2. time=99.156 ms
^C
----powerdns.com PING Statistics----
3 packets transmitted, 3 packets received, 0% packet loss
round-trip (ms)  min/avg/max/stddev = 98.704/98.974/99.156/0.239

In conclusion, if you are a Linux refugee and you miss the way ping worked on Linux, just add MACHINE_THAT_GOES_PING to your environment and don’t look back.

by JeffPC at November 29, 2015 02:06 PM

November 16, 2015

Josef "Jeff" Sipek

November 12, 2015

Josef "Jeff" Sipek

Juniper Networks Spam

For a few months now, I’ve been getting regular mass mailing from the UK branch of Juniper Networks. Up until today, I just ignored them thinking that it must be a phishing attempt. Today, for whatever reason I looked at the headers and they look perfectly fine. It appears to be a genuine mass mailing. The thing that gets to me is that I never subscribed to this mailing. I also never talked to or did business with them. I think it is sad that even rather large and established companies resort to unsolicited mass mailings like this. In my eyes, all this kind of spam accomplishes is to market the company in negative ways. Well, done Juniper, well done.

How do I know that this is spam and I didn’t sign up for it indirectly? It’s very simple…

  1. I know how to spell my name.
  2. It’s been a while since I went to a conference. (A frequent reason to be subscribed to a mailing like this.)
  3. I do not deal with networking or network operations so I have no reason to sign up for anything even remotely related to this.

This leads me to the conclusion that for whatever reason, Juniper decided to get (buy?) an email address list of questionable origin. Tsk, tsk, tsk.

Fun fact: I clicked on the “manage subscriptions” link to unsubscribe. The web form doesn’t let me unsubscribe unless I give them more information about me—country and state. No, thanks.

by JeffPC at November 12, 2015 03:05 PM

November 10, 2015

Nate Berry

OpenELEC runs great on the Raspberry Pi2

I’ve had a Raspberry Pi2 since earlier this year when it first came out. I had gotten it in a package which included a see-through plastic case, a miniSD card pre-loaded with Noobs on it, a wifi USB dongle, USB power supply, and HDMI cable. Since I already had a wireless keyboard and mouse I …

by Nate at November 10, 2015 02:05 AM

November 09, 2015

Josef "Jeff" Sipek

dis(1): support for System/370, System/390, and z/Architecture ELF bins

A few months ago, I came to the conclusion that it would be both fun and educational to add a new disassembler backend to libdisasm—the disassembler library in Illumos. Being a mainframe fan, I decided that implementing a System/390 and z/Architecture disassembler would be fun (I’ve done it before in HVF).

At first, I was targetting only the 390 and z/Architecture, but given that the System/370 is a trivial (almost) subset of the 390 (and there is a spec for 370 ELF files!), I ended up including the 370 support as well.

It took a while to get the code written (z/Architecture has so many instructions!) and reviewed, but it finally happened… the commit just landed in the repository.

If you get the latest Illumos bits, you’ll be able to disassemble 370, 390, and z/Architecture binaries with style. For example:

$ dis -F strcmp hvf             
disassembly for hvf

strcmp()
    strcmp:      a7 19 00 00        lghi    %r1,0
    strcmp+0x4:  a7 f4 00 08        j       0x111aec
    strcmp+0x8:  a7 1b 00 01        aghi    %r1,1
    strcmp+0xc:  b9 02 00 55        ltgr    %r5,%r5
    strcmp+0x10: a7 84 00 17        je      0x111b16
    strcmp+0x14: e3 51 20 00 00 90  llgc    %r5,0(%r1,%r2)
    strcmp+0x1a: e3 41 30 00 00 90  llgc    %r4,0(%r1,%r3)
    strcmp+0x20: 18 05              lr      %r0,%r5
    strcmp+0x22: 1b 04              sr      %r0,%r4
    strcmp+0x24: 18 40              lr      %r4,%r0
    strcmp+0x26: a7 41 00 ff        tmll    %r4,255
    strcmp+0x2a: a7 84 ff ef        je      0x111ae0
    strcmp+0x2e: 18 20              lr      %r2,%r0
    strcmp+0x30: 89 20 00 18        sll     %r2,%r0,24(%r0)
    strcmp+0x34: 8a 20 00 18        sra     %r2,%r0,24(%r0)
    strcmp+0x38: b9 14 00 22        lgfr    %r2,%r2
    strcmp+0x3c: 07 fe              br      %r14
    strcmp+0x3e: a7 28 00 00        lhi     %r2,0
    strcmp+0x42: b9 14 00 22        lgfr    %r2,%r2
    strcmp+0x46: 07 fe              br      %r14

I am hoping that this will help document all the places needed to change when adding support for a new ISA to libdisasm.

Happy disassembling!

by JeffPC at November 09, 2015 10:29 PM

November 07, 2015

Josef "Jeff" Sipek

Interactivity During nightly(1), part 2

Back in May, I talked about how I increase the priority of Firefox in order to get decent response times while killing my laptop with a nightly build of Illumos. Specifically, I have been increasing the priority of Firefox so that it would get to run in a timely manner. I have been doing this by setting it to the real-time (RT) scheduling class which has higher priority than most things on the system. This, of course, requires extra privileges.

Today, I realized that I was thinking about the problem the wrong way. What I really should be doing is lowering the priority of the build. This requires no special privileges. How do I do this? In my environment file, I include the following line:

priocntl -s -c FX -p 0 $$

This sets the nightly build script’s scheduling class to fixed (FX) and manually sets the priority to 0. From that point on, the nightly script and any processes it spawns run with a lower priority (zero) than everything else (which tends to be in the 40-59 range).

by JeffPC at November 07, 2015 01:45 AM

October 12, 2015

Josef "Jeff" Sipek

October 06, 2015

Josef "Jeff" Sipek

blahgd fmt 3 Limitations

Recently, I described the four post formats (fmt 0–3) that my blogging software ever supported. This is the promissed follow up.

I am reasonably happy with fmt 3, but I do see some limitations that I’d like to address. This will inevitably lead to fmt 4. fmt 4 will still be LaTeX-like, but it will address the following issues present in fmt 3.

HTML rendering is context in-sensitive: It turns out that there are many instances where blindly converting a character to whatever is necessary to render it properly in HTML is the wrong thing to do. For example, there are many Wikipedia articles that contain an apostrophe in the name. In a recent link dump, I mentioned Wikipedia article: Fubini’s theorem. The apostrophe used in the URL must be an ASCII code 0x27 and not a Unicode 0x2019 (aka. &rsquo;). If I forget to do this and type:

\wiki{Fubini's theorem}

The link text will look nice (thanks to &rsquo;), but the link URL will be broken because there is no Wikipedia article called “Fubini’s Theorem”. To work around this, I end up using:

\wiki[Fubini's theorem]{Fubini\%27s theorem}

This will use &rsquo; for the link text and %27 in the link URL. It’s ugly and not user friendly.

The “wiki” command isn’t the only one where special behavior makes sense.

Sadly, the fmt 3 parser just isn’t suited to allow for this. It is the yacc grammar that converts single and double quotes (among other characters) to the appropriate HTML escapes. Eventually, this converted string gets fed to the function that turns the one or two arguments into a link to Wikipedia. At this point, the original raw text is lost. However that is exactly what is needed to link to the proper place!

Metadata is duplicated: Another issue is that it would be nice to keep the metadata of the post with the post text itself. LaTeX-like markup lends itself very nicely to this. For example:

\title{Post Formats in blahgd}
\tag{reply}
\tag{blahg}
\published{2015-10-05 19:04}

Unfortunately, it’d take some unpleasant hacks to stash these values (unmangled!) in the structure keeping track of the post while a request is processed. So, even for fmt 3, I have to keep metadata in a separate metadata file. (The thoughts and design behind the metadata file could easily fill a post of its own.)

At first, I did not mind this extra copy of the metadata. However, over time it became obvious that this duplication leads to the age-old consistentcy problem. It is tempting to solve this problem by restricting which copy can be modified. Given that being able to edit everything with a text editor is a key goal of blahgd, restricting what can be editted is the wrong solution. Instead, eliminating all but one copy of the metadata is the proper way to solve this.

Future Plans

To solve these limitations with fmt 3, I am planning for the next format’s parser to do less. Instead of containing the entire translation code in the lex and yacc files, I will have the parser produce a parse tree. Then, the code will transform the parse tree into an AST which will then be transformed into whatever output is necessary (e.g., HTML, Atom, RSS). This will take care of all of the above mentioned issues since the rendering pass will have access at the original text (or equivalent of it). Yes, this sounds a bit heavy-handed but I really think it is the way to go. (For what it’s worth, I am not the only one who thinks that converting markup to HTML should go through an AST.)

Obviously, one of the goals with fmt 4 is to keep as close to fmt 3 as is practical. This will allow a quick and easy migration of the over 400 posts currently using it.

by JeffPC at October 06, 2015 09:41 PM

October 05, 2015

Josef "Jeff" Sipek

Post Formats in blahgd

After reading What creates a good wikitext dialect depends on how it’s going to be used, I decided to write a short post about how I handled the changing needs that my blahg experienced.

One of the things that I implemented in my blogging software a long time ago was the support for different flavors of markup. This allowed me to switch to a “saner” markup without revisiting all the previous entries. Since every post already has metadata (title, publication time, etc.) it was easy enough to add another field (“fmt”) which in my case is just a simple integer identifying how the post contents should be parsed.

Over the years, there have been four formats:

fmt 0 (removed)
Wordpress compat
fmt 1
“Improved” Wordpress format
fmt 2
raw html
fmt 3
LaTeX-like (my current format of choice)

The formats follow a pretty natural progression.

It all started in January 2009 as an import of about 250 posts from Wordpress. Wordpress stores the posts in a html-esque format. At the very least, it inserts line and paragraph breaks. If I remember correctly, one newline is a line break and two newlines are a paragraph break, but otherwise is passes along HTML more or less unchanged. Suffice to say, I was not in the mood to rewrite all the posts in a different format right away so I implemented something that resembled the Wordpress behavior. I did eventually end up converting these posts to a more modern format and then I removed support for this one.

The next format (fmt 1) was a natural evolution of fmt 0. One thing that drove me nuts about fmt 0 was the handling of line breaks. Since the whole point of blahgd was to allow me to compose entries in a text editor (vim if you must know) and I like my text files to be word wrapped, the transformation of every newline to <br/> was quite annoying. (It would result in jagged lines in the browser!) So, about a month later (February 2009), I made a trivial change to the parsing code to treat a single newline as just whitespace. I called this changed up parser fmt 1. (There are currently 24 posts using this format.)

A couple of months after I added fmt 1, I came to the conclusion that in some cases I just wanted to write raw HTML. And so fmt 2 was born (April 2009). (There are currently 5 posts using this format.)

After using fmt 2 for about a year and a half, I concluded that writing raw HTML is not the way to go. Any time I wanted to change the rendering of a certain thing (e.g., switching between <strong> and <b>), I had to revisit every post. Since I am a big fan of LaTeX, I thought it would be cool to have a LaTeX-like markup. It took a couple of false starts spanning about six months but eventually (February 2011) I got the lex and yacc files working well enough. (There are currently 422 posts using this format.)

While I am reasonably happy with fmt 3, but I do see some limitations that I’d like to address. This will inevitably lead to fmt 4. I am hoping to make a separate post about the fmt 3 limitations and how fmt 4 will address them sometime in the (hopefully) near future.

by JeffPC at October 05, 2015 07:04 PM

September 26, 2015

Josef "Jeff" Sipek

GNU inline vs. C99 inline

Recently, I’ve been looking at inline functions in C. However instead of just the usual static inlines, I’ve been looking at all the variants. This used to be a pretty straightforward GNU C extension and then C99 introduced the inline keyword officially. Sadly, for whatever reason decided that the semantics would be just different enough to confuse me and everyone else.

GCC documentation has the following to say:

GCC implements three different semantics of declaring a function inline. One is available with -std=gnu89 or -fgnu89-inline or when gnu_inline attribute is present on all inline declarations, another when -std=c99, -std=c11, -std=gnu99 or -std=gnu11 (without -fgnu89-inline), and the third is used when compiling C++.

Dang! Ok, I don’t really care about C++, so there are only two ways inline can behave.

Before diving into the two different behaviors, there are two cases to consider: the use of an inline function, and the inline function itself. The good news is that the use of an inline function behaves the same in both C90 and C99. Where the behavior changes is how the compiler deals with the inline function itself.

After reading the GCC documentation and skimming the C99 standard, I have put it all into the following table. It lists the different ways of using the inline keyword and for each use whether or not a symbol is produced in C90 (with inline extension) and in C99.

Emit (C90) Emit (C99)
inline always never
static inline maybe maybe
extern inline never always

(“always” means that a global symbol is always produced regardless of if all the uses of it are inlined. “maybe” means that a local symbol will be produced if and only if some uses cannot be inlined. “never” means that no symbols are produced and any non-inlined uses will be dealt with via relocations to an external symbol.)

Note that C99 “switched” the meaning of inline and extern inline. The good news is, static inline is totally unaffected (and generally the most useful).

For whatever reason, I cannot ever remember this difference. My hope is that this post will help me in the future.

Trying it Out

We can verify this experimentally. We can compile the following C file with -std=gnu89 and -std=gnu99 and compare what symbols the compiler produces:

static inline void si(int x)
{
}

extern inline void ei(int x)
{
}

inline void i(int x)
{
}

And here’s what nm has to say about them:

test-gcc89:
00000000 T i

test-gcc99:
00000000 T ei

This is an extremely simple example where the “never” and “maybe” cases all skip generating a symbol. In a more involved program that has inline functions that use features of C that prevent inlining (e.g., VLAs) we would see either relocations to external symbols or local symbols.

by JeffPC at September 26, 2015 06:57 PM

September 23, 2015

Josef "Jeff" Sipek

2015-09-23

The Apple ISA — An interesting view of what Apple could aim for instruction set architecture-wise.

Internetová jazyková příručka — A reference book with grammar and dictionary detailing how to conjugate each Czech word.

Java is Magic: the Gathering (or Poker) and Haskell is Go (the game)

An Interview with Brian Kernighan (July 2000)

Booting a Raspberry Pi2, with u-boot and HYP enabled

The SmPL Grammar — Description of the grammar used by Coccinelle.

Netbooting Debian Squeeze — A link I had sitting around for a couple of years when I last set up a NFS-root netbooting Linux system.

Are there any 3 dimensional items wwe can’t print layer by layer — A humorous story about Wikipedia article: Fubini’s theorem and its relation to 3D printing.

The Diagnosis of Mistakes in Programmes on the EDSAC — In some ways, debugging hasn’t changed much since 1951.

by JeffPC at September 23, 2015 04:12 PM

September 22, 2015

Josef "Jeff" Sipek

git filter-branch

Recently, I had to rewrite some commits in a git repository. All I wanted to do was set the author and committer names and emails to the correct value for all the commits in a repository. (Have you ever accidentally committed with user@some.host.local as the email address? I have.) It turns out that git has a handy command for that: git filter-branch. Unfortunately, using it is a bit challenging. Here’s what I ended up doing. (In case it isn’t clear, I am documenting what I have done in case I ever need to do it again on another repository.)

The invocation is relatively easy. We want to pass each commit to a script that creates a new commit with the proper name and email. This is done via the –commit-filter argument. Further, we want to rewrite each tag to point to the new commit hash. This is done via the –tag-filter argument. Since we’re not trying to change the contents of the tag, we use cat to simply pass through the tag contents.

$ git filter-branch \
        --commit-filter '/home/jeffpc/src/poc-clean/process.sh "$@"' \
        --tag-name-filter cat \
        -- fmt4 load-all master
Rewrite a95e3603e5ec40e6f229e75425f1969f13c17820 (710/710)
Ref 'refs/heads/fmt4' was rewritten
Ref 'refs/heads/load-all' was rewritten
Ref 'refs/heads/master' was rewritten
v3.0 -> v3.0 (b56481e52236c8bd85e647c30bafad6ac651e3fb -> b53c5b3ae8e18de02e1067bada7a0f05d4bcd230)
v3.1 -> v3.1 (993683bf104f42a74a2c58f2a91aee561573f7cc -> 1a1f4ff657abc8e97879f68a5dc4add664980b71)
v3.2 -> v3.2 (090b3ff1a66fa82d7d8fc99976c42c9495d5a32f -> 60fbeb91b689c65217b5ea17e68983d6aebc0239)
v3.3 -> v3.3 (4fb6d3ac2c5b88e69129cefe92d08decb341e1ae -> dd75fbb92353021c2738da2848111b78d1684405)

Caution: git rewrite-branch changes the directory while it does all the work so don’t try to use relative paths to specify the script.

The commit filter script is rather simple:

#!/bin/sh

name="Josef 'Jeff' Sipek"
email="jeffpc@josefsipek.net"

export GIT_AUTHOR_NAME="$name"
export GIT_AUTHOR_EMAIL="$email"
export GIT_COMMITTER_NAME="$name"
export GIT_COMMITTER_EMAIL="$email"

exec git commit-tree "$@"

It just the right environmental variables to pass the right name and email to git commit-tree, which writes out the commit object.

That’s it! I hope this helps.

by JeffPC at September 22, 2015 02:31 AM

September 03, 2015

Josef "Jeff" Sipek

Dumping Memory in MDB

It doesn’t take much reading of documentation, other people’s blogs, and other random web search results to learn how to dump a piece of memory in mdb.

In the following examples, I’ll use the address fffffffffbc30a70. This just so happens to be an avl_tree_t on my system. We can use the ::dump command:

> fffffffffbc30a70::dump
                   \/ 1 2 3  4 5 6 7  8 9 a b  c d e f  v123456789abcdef
fffffffffbc30a70:  801dc3fb ffffffff 0087b1fb ffffffff  ................

Or we can use the adb-style /B command:

> fffffffffbc30a70/B
kas+0x50:       80      

We can even specify the amount of data we want to dump. ::dump takes how many bytes to dump, while /B takes how many 1-byte integers to dump (while for example, /X takes how many 4-byte integers to dump):

> fffffffffbc30a70,20::dump
                   \/ 1 2 3  4 5 6 7  8 9 a b  c d e f  v123456789abcdef
fffffffffbc30a70:  801dc3fb ffffffff 0087b1fb ffffffff  ................
fffffffffbc30a80:  20000000 00000000 09000000 00000000   ...............
> fffffffffbc30a70,20/B
kas+0x50:       80      1d      c3      fb      ff      ff      ff      ff      0       87      b1      
                fb      ff      ff      ff      ff      20      0       0       0       0       0       
                0       0       9       0       0       0       0       0       0       0       

Things break down if we want to use a walker and pipe the output to ::dump or /B:

> fffffffffbc30a70::walk avl | ::dump
                   \/ 1 2 3  4 5 6 7  8 9 a b  c d e f  v123456789abcdef
fffffffffbc6d2e0:  00000000 00feffff 0000001e 03000000  ................
> fffffffffbc30a70::walk avl | /B
kpmseg:
kpmseg:         0       0       0       0       0       0       0       0       0       

Even though there are 9 entries in the AVL tree, ::dump dumps only the first one. /B does a bit better and it does print what appears to be the first byte of each. What if we want to dump more than just the first byte? Say, the first 32? ::dump is of no use already. Let’s see what we can make /B do:

> fffffffffbc30a70::walk avl | 20/B
mdb: syntax error near "20"
> fffffffffbc30a70::walk avl | ,20/B
mdb: syntax error near ","

No luck.

Solution

Ok, it’s time for the trick that makes it all work. You have to use the ::eval function. For example:

> fffffffffbc30a70::walk avl | ::eval .,20::dump
                   \/ 1 2 3  4 5 6 7  8 9 a b  c d e f  v123456789abcdef
fffffffffbc6d2e0:  00000000 00feffff 0000001e 03000000  ................
fffffffffbc6d2f0:  00000000 00000000 200ac3fb ffffffff  ........ .......
                   \/ 1 2 3  4 5 6 7  8 9 a b  c d e f  v123456789abcdef
fffffffffbc34960:  00000000 00ffffff 00000017 00000000  ................
fffffffffbc34970:  00000000 00000000 200ac3fb ffffffff  ........ .......
                   \/ 1 2 3  4 5 6 7  8 9 a b  c d e f  v123456789abcdef
fffffffffbc31ce0:  00000017 00ffffff 00000080 00000000  ................
fffffffffbc31cf0:  00000000 00000000 200ac3fb ffffffff  ........ .......
                   \/ 1 2 3  4 5 6 7  8 9 a b  c d e f  v123456789abcdef
fffffffffbc35a80:  00000097 00ffffff 0000a0fc 02000000  ................
fffffffffbc35a90:  00000000 00000000 200ac3fb ffffffff  ........ .......
                   \/ 1 2 3  4 5 6 7  8 9 a b  c d e f  v123456789abcdef
fffffffffbc34880:  0000a0d3 03ffffff 00000004 00000000  ................
fffffffffbc34890:  00000000 00000000 200ac3fb ffffffff  ........ .......
                   \/ 1 2 3  4 5 6 7  8 9 a b  c d e f  v123456789abcdef
fffffffffbc31d60:  0000a0d7 03ffffff 000060e8 fb000000  ..........`.....
fffffffffbc31d70:  00000000 00000000 200ac3fb ffffffff  ........ .......
                   \/ 1 2 3  4 5 6 7  8 9 a b  c d e f  v123456789abcdef
fffffffffbc7f3a0:  000000c0 ffffffff 00b07f3b 00000000  ...........;....
fffffffffbc7f3b0:  00000000 00000000 200ac3fb ffffffff  ........ .......
                   \/ 1 2 3  4 5 6 7  8 9 a b  c d e f  v123456789abcdef
fffffffffbc7de60:  000080fb ffffffff 00105500 00000000  ..........U.....
fffffffffbc7de70:  00000000 00000000 200ac3fb ffffffff  ........ .......
                   \/ 1 2 3  4 5 6 7  8 9 a b  c d e f  v123456789abcdef
fffffffffbc7e000:  000080ff ffffffff 00004000 00000000  ..........@.....
fffffffffbc7e010:  00000000 00000000 200ac3fb ffffffff  ........ .......

Perfect! ::eval makes repetition with /B work as well:

> fffffffffbc30a70::walk avl | ::eval .,8/B
kpmseg:
kpmseg:         0       0       0       0       0       fe      ff      ff
kvalloc:
kvalloc:        0       0       0       0       0       ff      ff      ff
kpseg:
kpseg:          0       0       0       17      0       ff      ff      ff
kzioseg:
kzioseg:        0       0       0       97      0       ff      ff      ff
kmapseg:
kmapseg:        0       0       a0      d3      3       ff      ff      ff
kvseg:
kvseg:          0       0       a0      d7      3       ff      ff      ff
kvseg_core:
kvseg_core:     0       0       0       c0      ff      ff      ff      ff
ktextseg:
ktextseg:       0       0       80      fb      ff      ff      ff      ff
kdebugseg:
kdebugseg:      0       0       80      ff      ff      ff      ff      ff

/nap

There is one more trick I want to share in this post. Suppose you have a mostly useless core file, and you want to dump the stack. Not as hex, but rather as a symbol + offset (if possible). The magic command you want is /nap. ‘/’ for printing, ‘n’ for a newline, ‘a’ for symbol + offset (of the value at “dot”), and ‘p’ for symbol (or address) of “dot”. (Formatting differences aside, ‘p’ prints the pointer—“dot”, and ‘a’ prints the value being pointed to—*“dot”.)

For example:

> fd94e3a8,8/nap
0xfd94e3a8:     
0xfd94e3a8:     0xfd94f5a8      
0xfd94e3ac:     libzfs.so.1`namespace_reload+0x394
0xfd94e3b0:     0xfdd6ce28      
0xfd94e3b4:     0xfdd6a423      
0xfd94e3b8:     0xcc            
0xfd94e3bc:     libzfs.so.1`__func__.16928
0xfd94e3c0:     0xfdd6ce00      
0xfd94e3c4:     0xfdd6ce28      

Since the memory happens to be part of the stack, there are no symbols associated with it and therefore the ‘p’ prints a raw hex value.

So, remember: if you have a core file and you think that you need to dump the stack to scavenge for hopefully useful values, you want to…nap. :)

by JeffPC at September 03, 2015 08:12 PM

September 01, 2015

Josef "Jeff" Sipek

2015-09-01

Wikipedia article: Interchange — This definitely reminds me of xkcd: Highway Engineer Pranks. At the same time, it is fascinating how there is a whole set of standard interchanges.

DxOMark — Very in-depth reviews of SLR lenses and bodies.

Lisp as the Maxwell’s equations of software — Reading this has rekindled my interest in Lisp and Scheme.

This Man Has Been Trying to Live Life as a Goat

What’s going on with a Python assignment puzzle — As a C programmer, this is totally counter-intuitive to me.

Internet Mainframes Project — Screenshots of Wikipedia article: 3270 login screens of tons of internet facing mainframes.

The Case for Teaching Ignorance

by JeffPC at September 01, 2015 01:27 AM

August 10, 2015

Josef "Jeff" Sipek

2015-08-10

Cap’n Proto — an insanely fast data interchange format.

The First Port of Unix

International Obfuscated C Code Contest winning entries — list of all the winning entries for all 23 years of IOCCC.

How to destroy Programmer Productivity

The Open-Office Trap — Having spent a couple of years in an open-office environment, I can tell you first hand that open-office is a bad idea. It was very annoying dealing with one set of light switches for about 70 people. The people near the window wanted them off, while us far away from the window wanted them on. The noise was also annoying — the chatty people (e.g., sales and support) were the worst. They were not malicious, just doing their job or chatting between phone calls.

Inside The Secret World of Russia’s Cold War Mapmakers

Wikipedia article: Underwater rugby — It is more like underwater basketball. I find it fascinating that player positions are a 3D location not a 2D location like in “normal” sports.

The Memory Sinkhole — an x86 design flaw allowing ring -2 privilege escalation.

by JeffPC at August 10, 2015 01:32 PM

July 26, 2015

Eitan Adler

Pre-Interview NDAs Are Bad

I get quite a few emails from business folk asking me to interview with them or forward their request to other coders I know. Given the volume it isn't feasible to respond affirmatively to all these requests.

If you want to get a coder's attention there are a lot of things you could do, but there is one thing you shouldn't do: require them to sign an NDA before you interview them.

From the candidates point of view:

  1. There are a lot more ideas than qualified candidates.
  2. Its unlikely your idea is original. It doesn't mean anyone else is working on it, just that someone else probably thought of it.
  3. Lets say the candidate was working on a similar, if not identical project. If the candidate fails to continue with you now they have to consult a lawyer to make sure you can't sue them for a project they were working on before
  4. NDAs are hard legal documents and shouldn't be signed without consulting a lawyer. Does the candidate really want to find a lawyer before interviewing with you?
  5. An NDA puts the entire obligation on the candidate. What does the candidate get from you?
From a company founders point of view:
  1. Everyone talks about the companies they interview with to someone. Do you want to be that strange company which made them sign an NDA? It can harm your reputation easily.
  2. NDAs do not stop leaks. They serve to create liability when a leak occurs. Do you want to be the company that sues people that interview with them?

There are some exceptions; for example government and security jobs may require security clearance and an NDA. For mose jobs it is possible to determine if a coder is qualified and a good fit without disclosing confidential company secrets.

by Eitan Adler (noreply@blogger.com) at July 26, 2015 08:13 PM

June 26, 2015

Josef "Jeff" Sipek

2015-06-26

1980s computer controls GRPS heat and AC

Who Has Your Back? — An annual report looking at how different major companies react to government requests for data.

Learn Lua in 15 Minutes

Mega-processor — A project to build a micro-processor using discrete transistors.

Stevey’s Google Platforms Rant — A rant by a Googler about Google’s failure to understand platforms (vs. products).

by JeffPC at June 26, 2015 04:55 PM

June 22, 2015

Josef "Jeff" Sipek

Simple File System

On three or four occasions over the past 4 years, I had a use for simple file system spec. Either to teach people about file systems, or to have a simple file system to implement to learn the idiosyncracies of an operating system’s VFS layer. This is what I came up with back in 2011 when helping a friend learn about file systems.

Simple File System

The structure is really simple. All multi-byte integers are stored as big endian.

A disk is a linear sequence of blocks. Each block is 512 bytes long. You can read/write a block at a time. The first block on the disk is number 0, the second is 1, etc.

The following is the file system structure. First of all, the file system uses 1024 byte blocks, and therefore you need to issue two disk I/Os to process a file system block worth of data.

The first fs block (disk blocks 0 & 1) is reserved, you should not change it in any way.

The second block contains the superblock:

struct superblock {
        uint32_t magic;        /* == 0x42420374 */
        uint32_t root_inode;   /* the disk block containing the root inode */
        uint32_t nblocks;      /* number of block on the disk */
        uint32_t _pad[253];    /* unused (should be '\0' filled) */
};

Starting at the third block is the block allocation map. The most significant bit of the first byte of this block represents fs block 0. The next bit represents block 1, etc.

Each file is represented by an inode. The inode contains a number of data block pointers. The first pointer (blocks[0]) contains the first 1024 bytes of the file, blocks[1] the second, etc. The timestamps are in microseconds since 00:00:00 Jan 1, 1900 UTC.

sturct inode {
        uint32_t size;         /* file length in bytes */
        uint32_t _pad0;        /* unused (should be 0) */
        uint64_t ctime;        /* creation time stamp */
        uint64_t mtime;        /* last modification time stamp */
        uint16_t nblocks;      /* number of data blocks in this file */
        uint16_t _pad1;        /* unused (should be 0) */
        uint32_t _pad2;        /* unused (should be 0) */
        uint32_t blocks[248];  /* file block ptrs */
};

The root directory is represented by an inode, the data pointed to by this inode’s blocks[] have a special format. They should be treated as arrays of directory entries. The filename is space padded (so, “foo.txt” would be stored as “foo.txt                     ”).

struct direntry {
        char fname[28];        /* the filename */
        uint32_t inode;        /* the inode block ptr */
};

So, graphically, the file system looks something like:

sb -> rootinode
        |-> direntries
        |     |-> <"foo.txt", inodeptr>
        |     |                 \-> inode
        |     |                       |-> data
        |     |                       |-> data
        |     |                       \-> data
        |     |-> <"bar.txt", inodeptr>
        |     |                 \-> inode
        |     |                       |-> data
        |     |                       |-> data
        |     |                       \-> data
        |     |             .
        |     |             .
        |     |             .
        |     \-> <"xyz.txt", inodeptr>
        |                       \-> inode
        |                             |-> data
        |                             |-> data
        |                             \-> data
        |                   .
        |                   .
        |                   .
        \-> direntries
              |-> <"aaa.txt", inodeptr>
              |                 \-> inode
              |                       |-> data
              |                       |-> data
              |                       \-> data
              |-> <"bbb.txt", inodeptr>
              |                 \-> inode
              |                       |-> data
              |                       |-> data
              |                       \-> data
              |             .
              |             .
              |             .
              \-> <"ccc.txt", inodeptr>
                                \-> inode
                                      |-> data
                                      |-> data
                                      \-> data

by JeffPC at June 22, 2015 01:53 PM

June 16, 2015

Josef "Jeff" Sipek

Tail Call Optimization

I just had an interesting realization about tail call optimization. Often when people talk about it, they simply describe it as an optimization that the compiler does whenever you end a function with a function call whose return value is propagated up as is. Technically this is true. Practically, people use examples like this:

int foo(int increment)
{
	if (increment)
		return bar() + 1; /* NOT a tail-call */
	
	return bar(); /* a tail-call */
}

It sounds like a very solid example of a tail-call vs. not. I.e., if you “post process” the value before returning it is not a tail-call.

Going back to my realization, I think people often forget about one type of “post processing” — casts. Consider the following code:

extern short bar();

int foo()
{
        return bar();
}

Did you spot it? This is not a tail-call.

The integer promotion from short to int is done after bar returns but before foo returns.

For fun, here’s the disassembly:

$ gcc -Wall -O2 -c test.c
$ dis test.o
...
foo()
    foo:     55                 pushl  %ebp
    foo+0x1: 89 e5              movl   %esp,%ebp
    foo+0x3: 83 ec 08           subl   $0x8,%esp
    foo+0x6: e8 fc ff ff ff     call   -0x4	<foo+0x7>
    foo+0xb: c9                 leave  
    foo+0xc: 98                 cwtl   
    foo+0xd: c3                 ret    

For completeness, if we change the return value of bar to int:

$ gcc -Wall -O2 -c test.c
$ dis test.o
...
foo()
    foo:       e9 fc ff ff ff     jmp    -0x4	<foo+0x1>

I wonder how many people think they are tail-call optimizing, but in reality they are “wasting” a stack frame because of this silly reason.

by JeffPC at June 16, 2015 08:13 PM